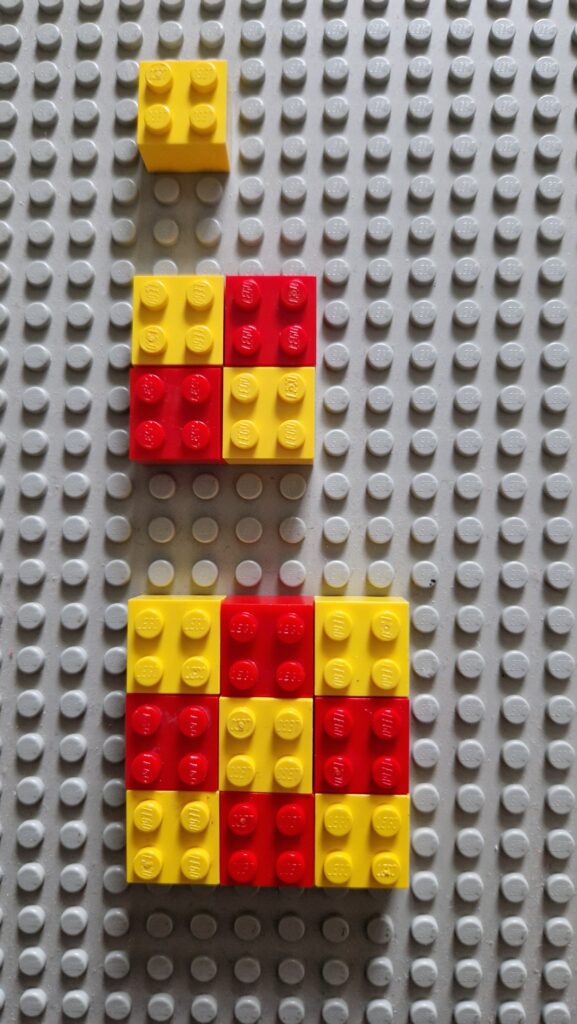
Here are the first three stages of a pattern made out of Lego. What do you notice? What do you wonder? What questions might a mathematician ask?
Can you work out how many yellow bricks and how many red bricks you’d need to make the tenth pattern in the sequence? Or the 100th pattern? Or the nth pattern?
Each day I will update this post with the next challenge. To find out what GeoGebrAdvent is all about, check out this post. To see people’s creations, look for #GeoGebrAdvent on Twitter.
December 1st: Create a star December 2nd: Create a snowman December 3rd: Create a snowflake with sixfold symmetry December 4th: Create a paper chain December 5th: Create some holly December 6th: Make fairy lights/Christmas tree lights/holiday lights December 7th: Create a tessellation December 8th: Design wrapping paper December 9th: Make a bell or some bells December 10th: Design a ribbon or bow December 11th: Create a wreath December 12th: Create a Christmas tree December 13th: Make an angel December 14th: Make a Christmas scene using only triangles December 15th: Christmas dinner December 16th: Gingerbread December 17th: Trees – not Christmas tree but wintery tree scene December 18th: Make a Christmas card December 19th: Create a winter scene using only circles and arcs December 20th: Make a bauble December 21st: Father Christmas! December 22nd: Create a (Christmas themed) optical illusion December 23rd: Make a shooting star December 24th: Make a present or gift
It’s Advent! As well as opening the first door of my chocolate calendar, I wanted to do an advent challenge this year, and as you can never have too much GeoGebra in your life, I thought a GeoGebra challenge a day from now until Christmas would be a nice fun thing.
For each day of advent, I will post a challenge to complete in GeoGebra. You can share pictures or animations on Twitter (or Instagram if you prefer) using the hashtag #GeoGebrAdvent. I’m hoping people will join in to create beautiful geometrical art, improve their GeoGebra skills and share any cool and ingenious methods they come up with! The challenges are designed to get harder during the course of advent, but you are of course encouraged to attempt them at whatever level of difficulty you like, and to adapt, mix up, mash up, and let your imagination run wild – these are prompts rather than commandments.
Big thank you to Sam Hartburn and Becky Warren who gave me ideas for some of the challenges, and who are both queens of GeoGebra creativity. If you’re not already following them on Twitter, they are @SamHartburn and @becky_k_warren.
So, onto today’s challenge: Create a star. It can be as simple or as complicated as you like. It can be two dimensional or three dimensional, static or animated, coloured or monochrome. Don’t forget to share your star on social media with the hashtag #GeoGebrAdvent.
Suppose you want to find the area of a dodecagon inscribed in a circle of radius 1. One way to do this is to divide the dodecagon into 12 isosceles triangles with two sides of length 1 and an angle between them of 30°. Then we can use the formula for the area of a triangle $$A = \frac12ab \sin C$$ to give us an area of $$ \frac12 \times 1^2 \times \sin 30 = \frac14$$ Multiplying by 12, the area of our dodecagon is therefore 3 square units.
There’s another way to get this result which doesn’t rely on knowing that $\sin 30 = \frac12$. I first came across this dissection of a dodecagon when working at NRICH and looking for ideas for the Wild Maths site, which was about exploring mathematical creativity. Take a look at the GeoGebra construction below.
Move the slider, or click the play button to start the animation. There’s a little bit of thinking to be done to convince yourself that the pieces fit nicely together with no gaps, but I hope you agree it’s a very pleasing way to show that the area of the dodecagon is 3 square units!
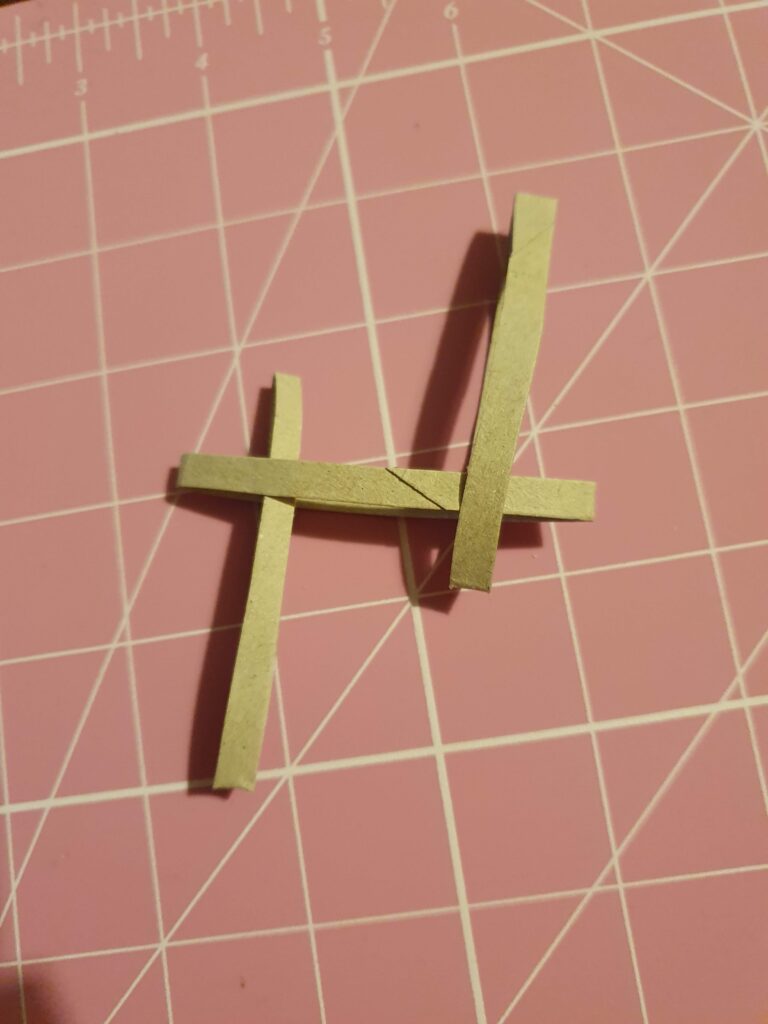
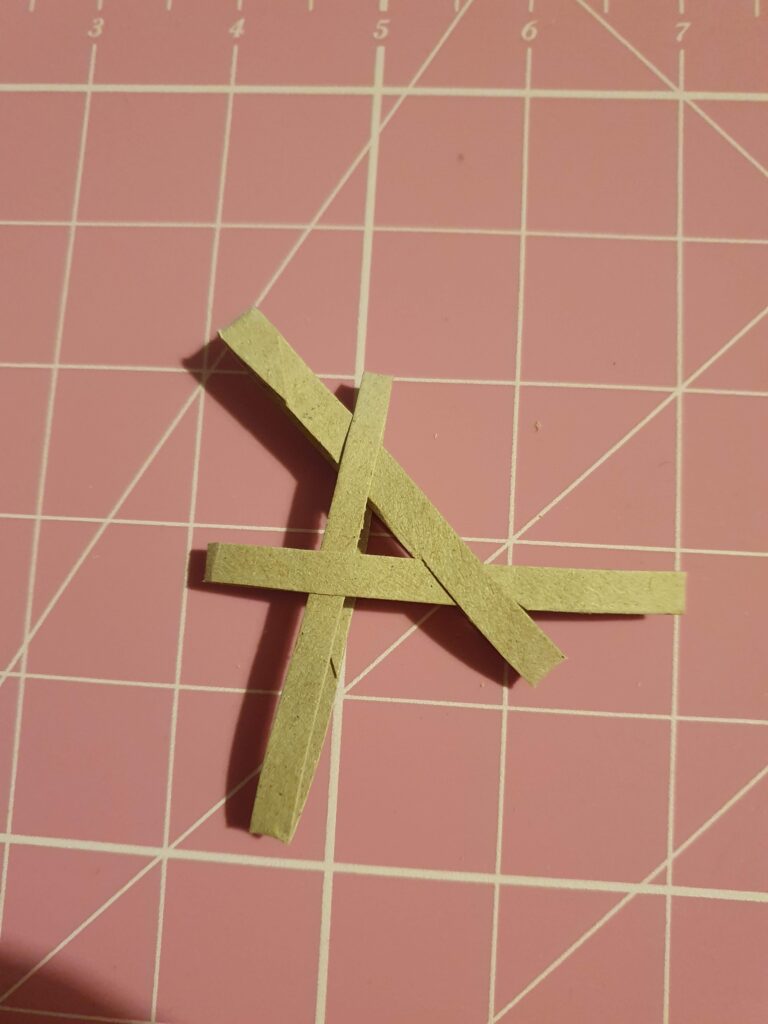
If, like me, you stocked up on loo roll at various points during last year, and, like me, you don’t always remember to check the bathroom on recycling bin day, you may have ended up with a mountain of cardboard tubes that just cry out for a Blue Peter style craft project. Here’s something you could try. I saw a completed model using this technique ages ago on social media, and immediately decided I needed to reverse-engineer it and make my own models. I started making a dodecahedron and then ran out of loo roll middles and abandoned it in a corner to gather dust. It turned up when I was having a New Year Declutter and I realised I had plenty of raw materials (seriously, I don’t think I remembered to throw out a loo roll middle for the entirety of 2020), so I had a go at making something.
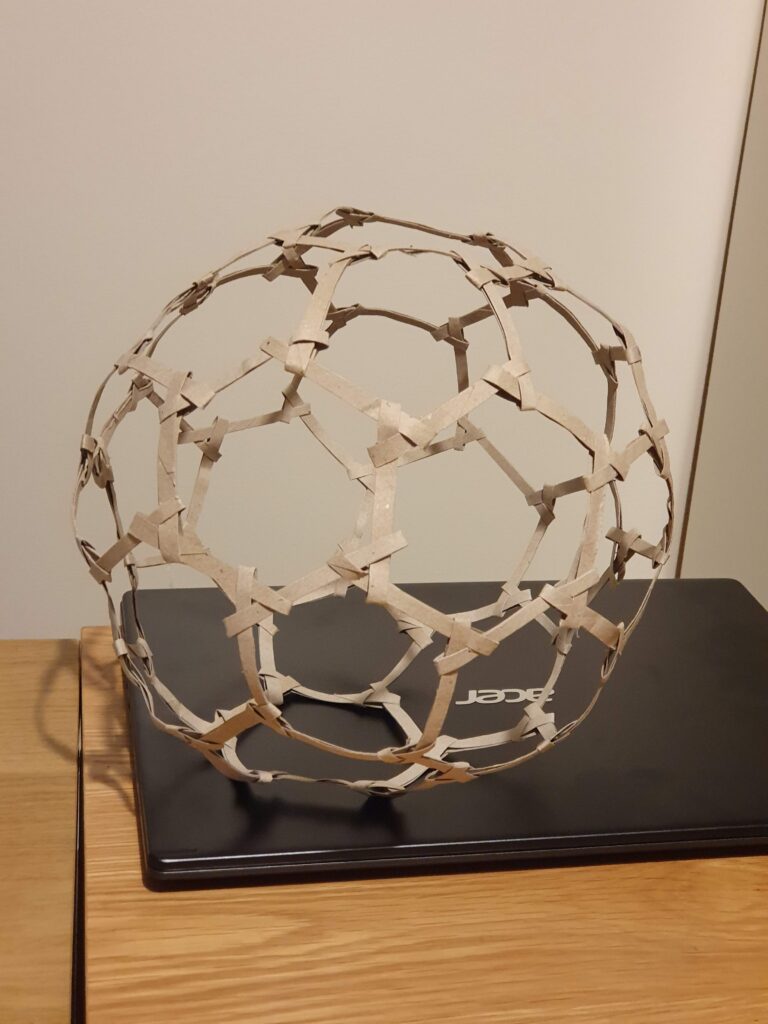
The pictures above show how to get started. Cut several toilet rolls into thin loops, around 3-5mm across should be fine. Then interlock three of them so that each loop goes over one and under the next, and then pull it tight as shown in the third picture. Now it’s decision time – what solid shall we make? I decided, rather ambitiously, to begin with a football, which (as Matt Parker famously got quite upset about once) are made up of a mixture of pentagons and hexagons. In fact, there are 12 pentagons and 20 hexagons, giving a total of 90 edges (or 90 little bits of cut up loo roll middle!) Mathematically speaking the football shape is a truncated icosahedron, one of the Archimedean solids.
I’m pretty pleased with the finished product. If you put a light in the middle, you get cool shadows too, but that’s really hard to take good pictures of, so you’ll just have to imagine it (or make your own!) As with other mathematical makes, I felt as though I understood the structure of the shape better as a result of figuring out how to make it. If you do decide to make your own, it’s quite a challenge to figure out how to get every piece but one into place (unfortunately the last piece does need to be cut and taped in order to close off the shape). Of course, if you’re doing it just for fun and you’re not so worried about using some tape, you could cut more sections for ease of assembly.
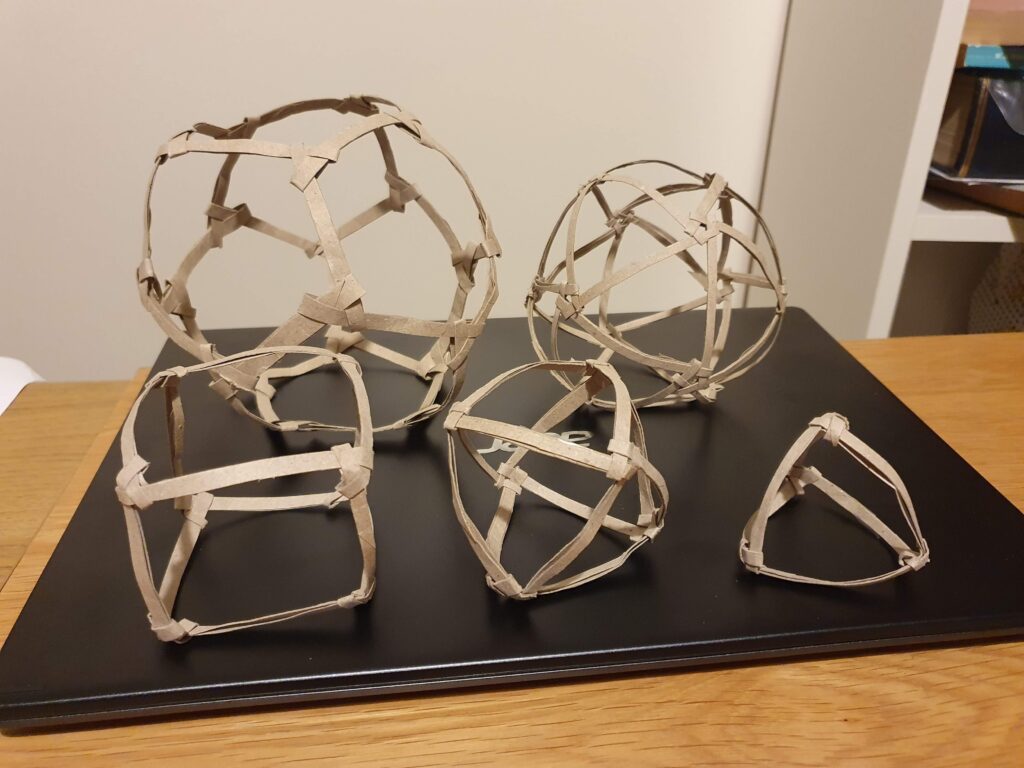
This blog post should have been published mid-afternoon but I got carried away and made a set of Platonic Solids too.
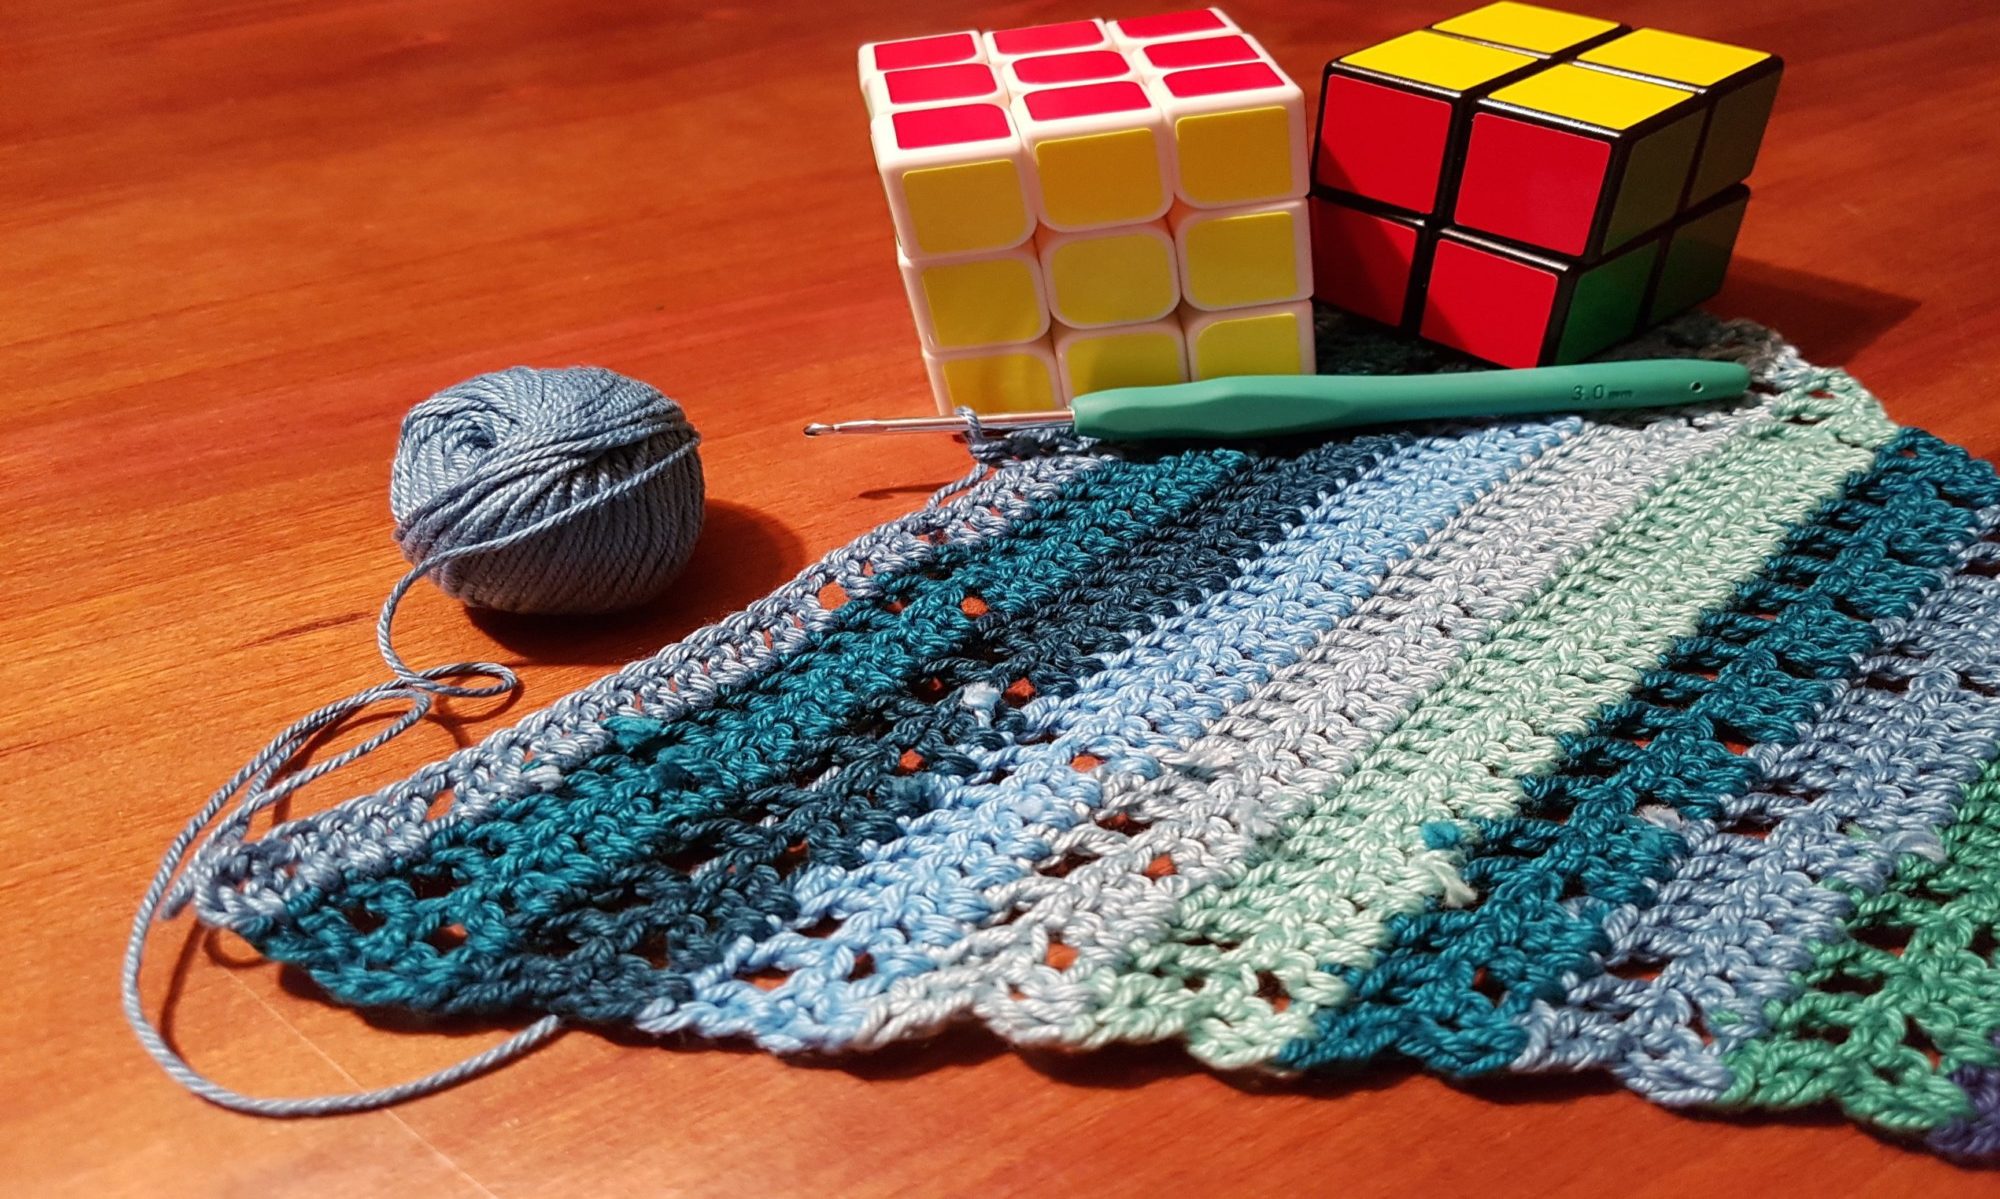
One of my favourite origami collaborations with Fran Watson last term was our Christmas Decorations webinar that we put on in December. Between us we demonstrated how to make hanging decorations, stars and a little box to put presents or treats in. The folding pattern that Fran showed in the webinar was one that I had learned many years before from a book but had forgotten about until Fran re-introduced it to me. Here are some online instructions.
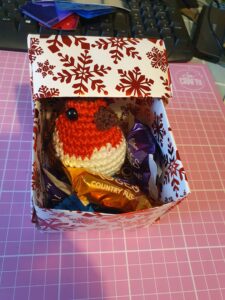
The nice thing about this box is that by adjusting the folding pattern very slightly, you can make a box with a slightly larger footprint that can be used as a lid, or you can adjust the model and fold by thirds instead of quarters to get a much taller cubic box. I decided to use my mathematical skills to calculate the paper size needed to make a box with a lid to wrap a Christmas robin that I crocheted for a family member’s Christmas present. As the robin was about as tall as he was long, the cubic box seemed the most appropriate, but I wasn’t sure how big a square I needed to start with, so I folded a box from a 15cm square (which I knew would be too small), and measured the dimensions of the completed box. Then I could scale it up and cut a square of wrapping paper which would definitely fit my robin.
For the lid, I wanted to make a normal box rather than the cubic box, as I wanted the lid to be much shorter than the box, but slightly larger in cross section than my cube. Again, I worked out the relative sizes of the paper and the completed box, and used this to work backwards and calculate the paper size I needed to begin with. I cut the appropriate square from the same wrapping paper, and my robin’s home was finished.
When thinking about how I want mathematics classrooms to be set up, one of my goals is to make sure that children leave school with the confidence to be able to handle questions of scaling, ratio and proportion like my robin box problem. So many people would be anxious to attempt the mathematics I needed to do, or would lack the confidence to try. This is another good reason to include origami or other hands-on construction in mathematics lessons. Setting a challenge like my robin problem gives children opportunities to experiment, conjecture, explain their reasoning to others, make mistakes, revisit their thinking and finally experience success, in a way that a dry and dusty textbook exercise of abstract ratio questions might not.
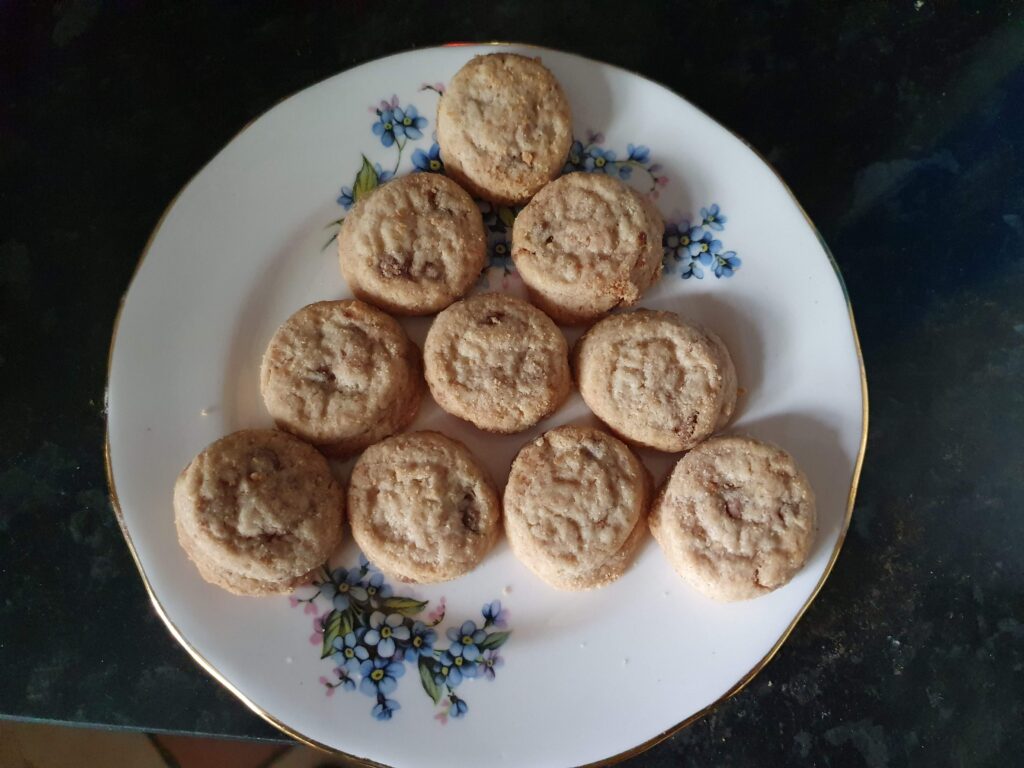
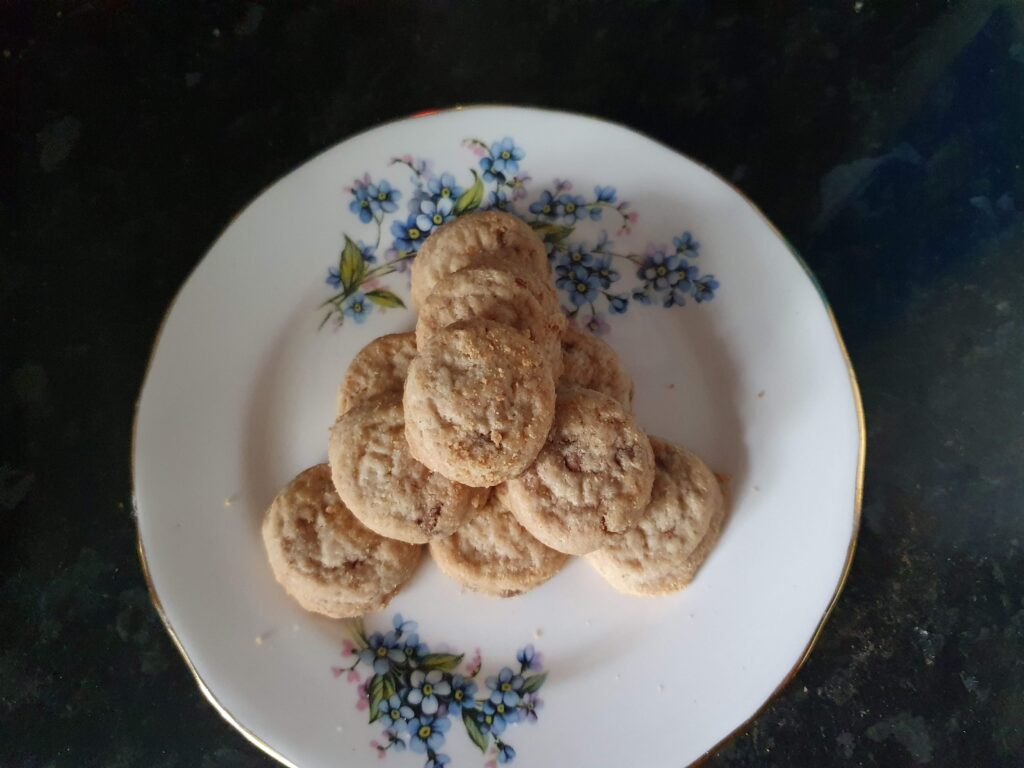
Another “notice, wonder” memory from lockdown – I got into the habit of taking a photo of any mathematically interesting morning snack that I enjoyed with my coffee for a while, and posting it on Twitter to provoke mathematical discussion. Back in April I was eating up some miniature cookies that were left over from a musical carousel biscuit tin that I had bought in the post-Christmas sales (musical carousel biscuit tin is every bit as awesome as it sounds, I promise you). They were small enough that it was difficult to estimate what should count as a proper portion, so I experimented with some different ways of arranging them on the plate:
ten cookies arranged in a triangle
ten cookies arranged in a triangular pyramid
Ten normal-sized biscuits would be a bit much I think, unless I’d been for a ten km run immediately before, which is something that has never happened to me, but ten of these tiny cookies seems like a reasonable fuel to accompany some coffee and then power my brain to write high-quality maths content…
It’s interesting to me though that ten cookies can be arranged in these two pleasing ways. In the first picture, the cookies show 10 as a triangular number, 1 biscuit on the top row, 2 on the second, 3 on the third and 4 on the fourth. The second picture steps up into the third dimension and represents 10 as a tetrahedral number (remember those from this post?) – a triangle of 6 (1+2+3) on the bottom layer, 3 (1+2) on the middle layer, and 1 on the top layer.
If you’re anything like me you’re now asking yourself which other numbers are both triangular and tetrahedral. Well 1 is a rather boring example, but how far after 10 do we have to go before we find another? And will it be a reasonable number of biscuits to eat in one sitting? I decided a quick way to find out would be to create a spreadsheet showing the triangular and tetrahedral numbers in Excel and just look down until I found a number that appeared in both columns. Thankfully the next example is small enough that I could just eyeball it, but I also remembered a neat trick for checking whether a number is a triangular number or not; if T is triangular, then 8T+1 is always square, so I got my spreadsheet to work out √(8x+1) for my tetrahedral numbers, and then looked for the ones which were exact answers rather than lots of decimal places. This gave me 1, 10, 120 and 1540, the first four numbers which are both triangular and tetrahedral according to the Online Encyclopedia of Integer Sequences. I think 120 or 1540 biscuits might just be too much for one person, so until Covid restrictions are lifted for long enough for me to share them, I will stick to just eating 1 or 10 biscuits at a time!
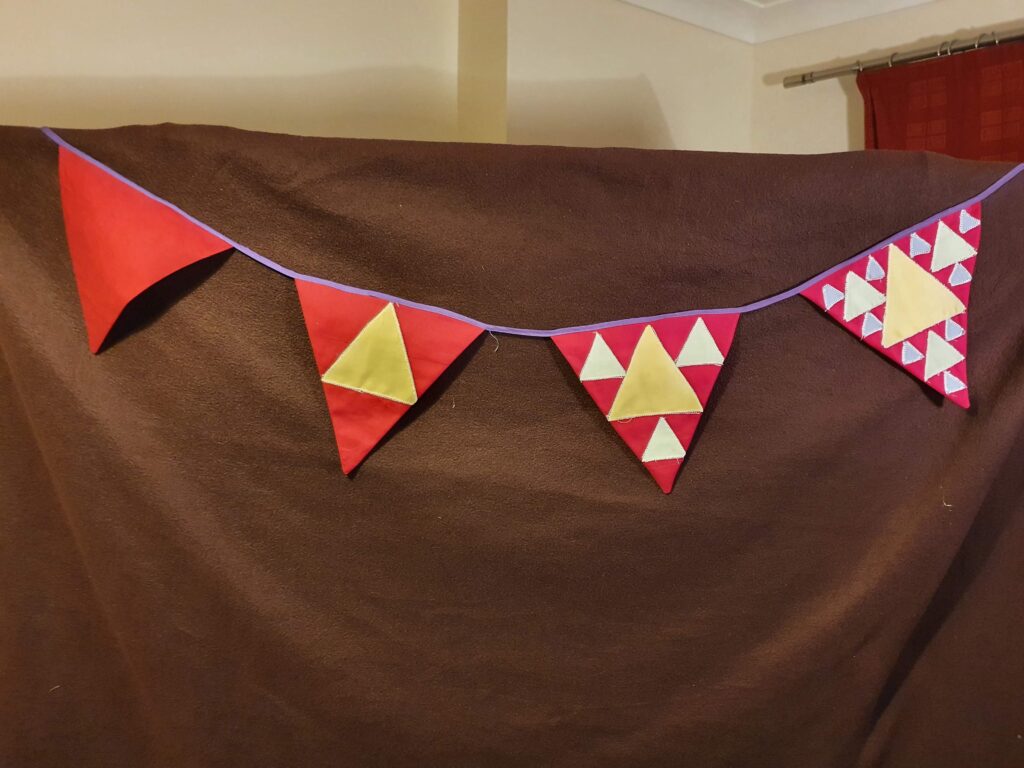
Back in the autumn, the excellent Aperiodical website ran a competition to design “fractal bunting”. I had done a fair amount of sewing over the summer, making face masks for me and my loved ones so that we could protect ourselves and others when out and about while also looking stylish in a variety of fabrics that had been sitting in my stash for years waiting for the perfect use. When I saw the “fractal bunting” prompt, it seemed like a good excuse to use the sewing machine for something a little different. I had never tried making bunting, but as it’s usually triangular, it seemed like the Sierpinski Triangle would be a good starting point for my design.
I found a bunting pattern and cut out a paper template, and cut out four red triangles. Then I folded the top corner of my template down to meet the midpoint of the base to make a new template, a triangle with half the side length and a quarter of the area. I cut out three yellow triangles using this template. I did the same again to cut out six green triangles and then finally cut out nine tiny blue triangles. Then I figured out how to use the applique settings on my sewing machine to attach all the different sizes of triangle as shown below:
My bunting shows four stages of evolution of the Sierpinski triangle. I was right at the limits of being able to sew round the smallest triangles which is why they look a bit wonky – if I wanted to do five stages I’d have to make my bunting significantly bigger! However, I think there are lots of “What do you notice? What do you wonder?” questions that the image above might provoke: If I made 5 pieces of bunting (with one extra fractal layer), how many of each triangle would I need? The stitching represents the perimeter of each triangle added, so how much extra stitching is there on each new layer? Which of the four flags took longest to make? How much longer did it take to make than the previous one?
I found that as with so many mathematical ideas, actually making a physical model helped me understand the idea in new ways. Sewing round all those little triangles gave me a different appreciation of the fractal nature, and coming to the physical limits of the material I was working with made me reflect on the theoretical nature of limiting processes. When we talk about infinity and limits, we are talking about something we can’t hold in our hands or see. I can’t physically make the Sierpinski triangle, I can only make an approximation to it. But making that approximation helps me to think about the properties of the theoretical mathematical object in a different way.
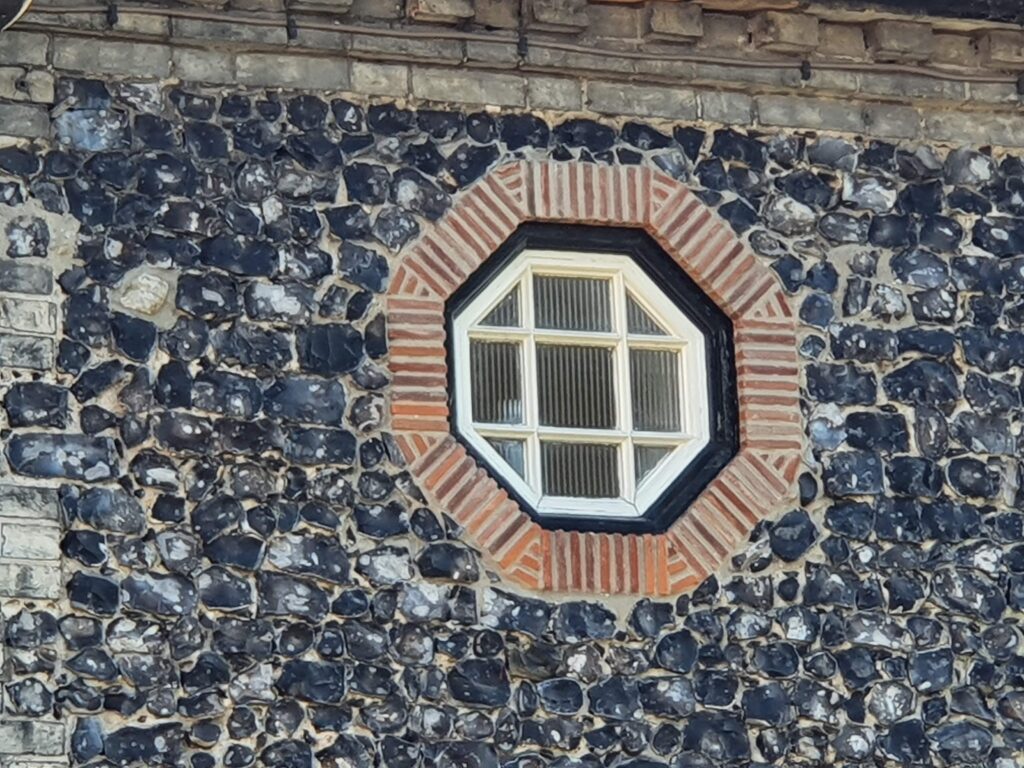
Back in September, when lockdown had lifted sufficiently to visit neighbouring towns and countryside for a walk and a look at slightly different scenery, I visited the town of Thetford with my partner. As we waited to cross a road I happened to glance up and notice this window:
There are many mathematical “What do you notice? What do you wonder?” questions that might be provoked by this octagonal window and the decorative brick pattern around it. Of particular interest to me was the way the octagon was made up of the smaller panes, and I wanted to see if I could recreate it using paper.
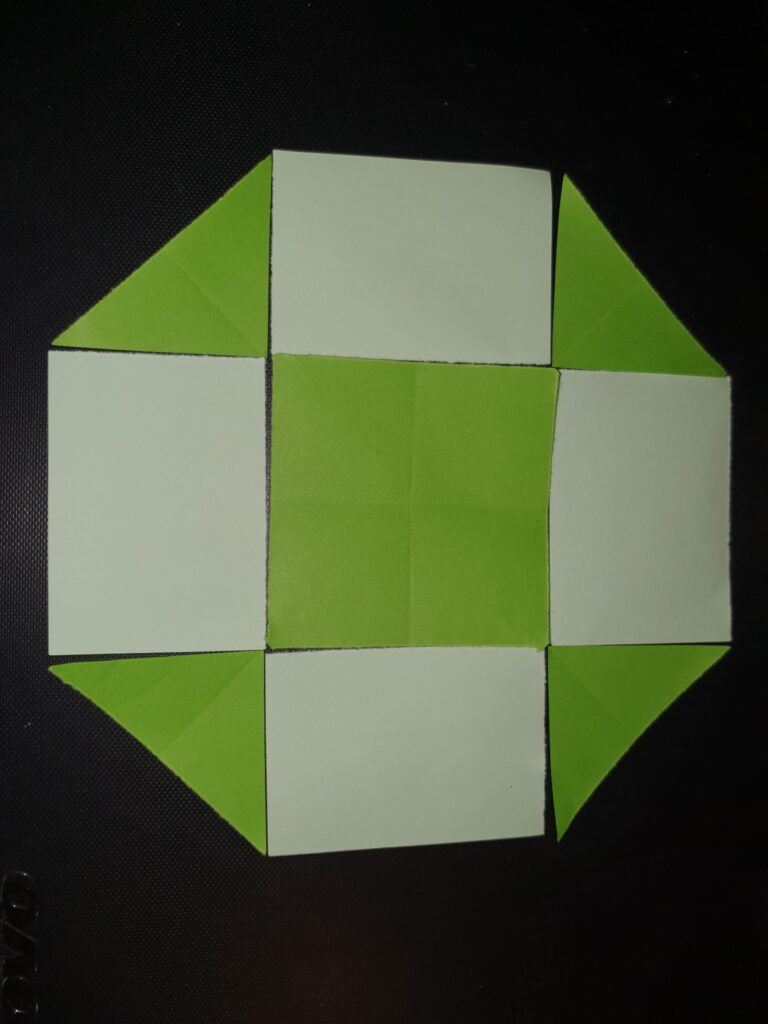
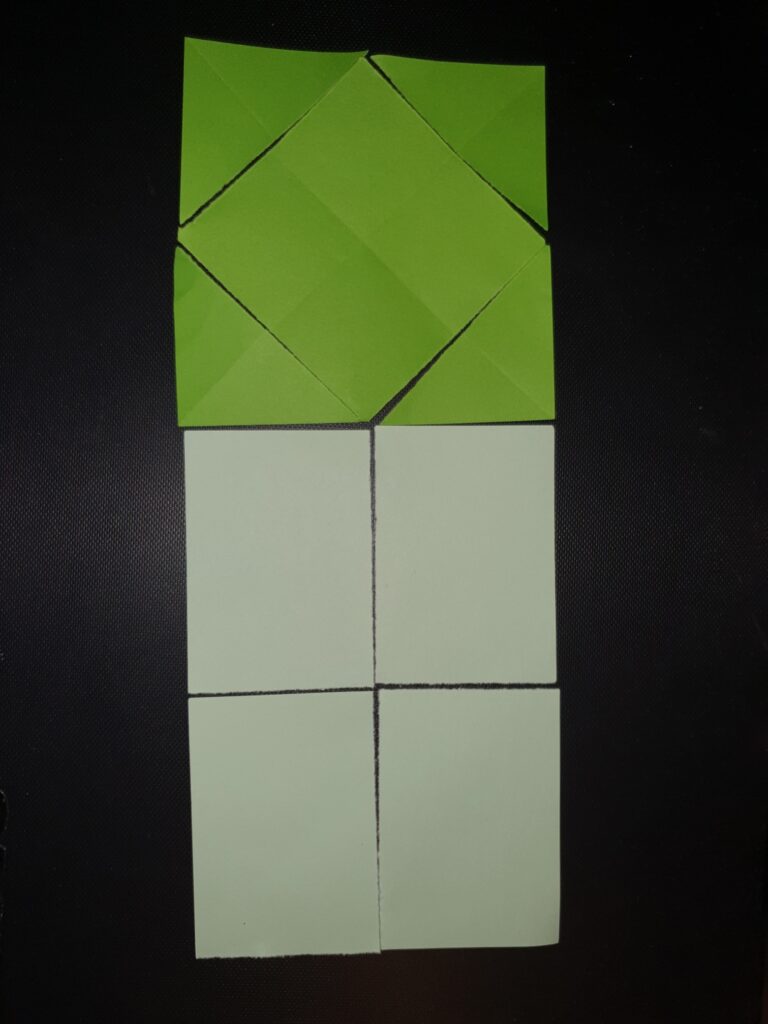
These photos show how I used three squares of paper (there was some paper left over) to recreate the octagon. The photo on the right shows how I rearranged the pieces to help me calculate the area of a regular octagon. Let’s suppose the octagon has side length 1 unit. That means the large square in the middle has side length 1, and the square at the top of the right hand picture has side length √2. Each of the pale rectangles has a long side of 1, so the rectangle in the right hand image has dimensions √2 and (√2+2). So the area of the regular octagon is √2(√2+2) which is 2+2√2.
Back in April, starting to get a bit of cabin fever from lockdown, and inspired by a photo sent to me by a friend, I decided to get the Lego out and build a tower all the way up to the ceiling. The video above shows a timelapse of the build. Some questions you might wish to ponder as you watch the video: How long did it actually take? Or alternatively, how much has the video been sped up? How many bricks do you think I used? (If I used this as a prompt in the classroom I might ask children to tell me a number they know is definitely too low and one they know is definitely too high – giving a wrong answer is much easier than giving a right answer as there are so many more of them!) Are there any patterns to the colours that I used? Which colour did I use most? How tall is the tower? If we scaled the tower up by a scale factor to make the door big enough for a real person rather than a lego person, how tall would the tower be? How does this compare to actual skyscrapers in the real world? If you have answers to any of these questions or a question of your own, leave a comment!