I hope you enjoy playing with my little snowflake-generator above – move the five points on the right to create snowflake designs on the left! Made of course with GeoGebra – if you haven’t already heard me wax lyrical about this fab bit of software, that means you didn’t read Monday’s blog post.
The snowflake generator was made in a slightly different way from the method I used in my GeoGebra workshop before Christmas – I created a polygon, reflected it in the y-axis, and then used the spreadsheet to quickly rotate each polygon through multiples of 60°. By changing this angle from 60° to 45° you could make designs with eight-fold symmetry (but don’t call them snowflakes or you’ll incur the wrath of the anti-snowfake campaigners!)
If you create any pleasing snowflake designs, do share a screengrab with me, and if you have other ideas for GeoGebra things you think I should create or you’d like me to run a GeoGebra workshop for you, get in touch!
2020 has raised many challenges, and has required incredible patience from all of us. Patience as we wait for life to get back to normal, patience as rules change suddenly and plans are cancelled at the last minute, patience with technology as we cope with frozen screens, muted microphones, and unreliable broadband. There has also been solitude – my last day in an office with colleagues was March 16th, and by the time restrictions lifted to allow co-working again, I had moved on from my job and become a full-time freelancer, so I now spend much of my time enjoying my own company. It turns out that time and patience are the two ingredients needed to make an origami model I’ve had my heart set on making for many years…
I first came across the Five intersecting tetrahedra model in “The Origami Handbook” by Rick Beech, which I bought when I was a student in around 2002 or 2003. The model was designed by Tom Hull, and you can read more about it on his website. When I first saw the model I wanted to make it but having made one tetrahedron I abandoned the attempt because my paper was too flimsy and I did not think all five would stay together. I didn’t return to the model for more than a decade.
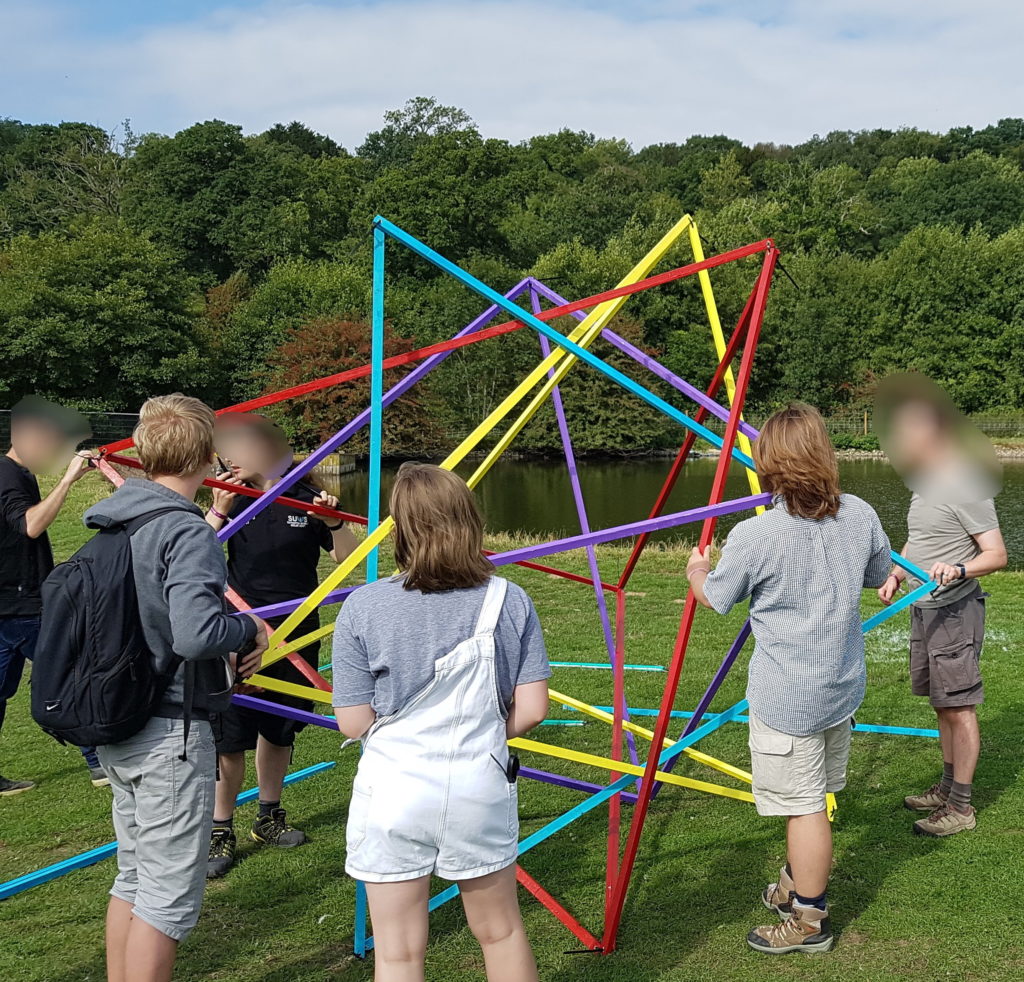
The tetrahedra crossed my path again at Electromagnetic Field in 2018. Matt Parker had a harebrained scheme to create a lit-up version of five intersecting tetrahedra made out of wood, and a bunch of us helped hold bits of the framework to try to get the lines going over and under each other in the right order. This was where I first appreciated that in the model, you can pair off tetrahedra using different colours to help you; if you have a red tetrahedron and a blue one, then the point of the red goes through the base of the blue and the point of the blue goes through the base of the red. In the completed model, every face of each tetrahedron has one of the other four colours going through it. This helps with the construction, though it wasn’t enough for me to get my head round the 3D geometry.
Five intersecting tetrahedra being build at EMF
My next encounter with FIT, as it’s known to its friends, was at Talking Maths in Public 2019. I was part of a collaborative effort to make the model, under the guidance of Philipp Legner, founder of the excellent Mathigon website. There are instructions on Mathigon for making the FIT modules, and I’ve referred to these in making my own models.
I was delighted to be part of a group that successfully made the model but I was still determined to make my own some day. I thought that day might come in time for MathsJam 2019, when I gave a talk about dodecahedra. One way of understanding the five intersecting tetrahedra is by looking at the twenty vertices of a dodecahedron and partitioning them into five groups of four. I successfully created a 3D GeoGebra construction to help me better understand the geometry but I still couldn’t manage to put the origami model together – every time I tried I would get two tetrahedra together and part of the third and then become frustrated with which parts went over and which parts went under, and end up with battered and creased modules that were only fit for the recycling bin. MathsJam 2019 had to make do with a photo of the Talking Maths in Public model.
Fast forward to November 2020. I had spent a big chunk of the autumn doing origami; Fran Watson and I had put together webinars for Maths Weeks in Scotland and in England. I had also found that it was an ideal lockdown hobby – modular origami with its soothing repetitions kept me calm in a chaotic and frankly scary world. I had recently made a beautiful though complicated star from instructions on Paolo Bascetta’s website, and this somehow gave me the confidence to go back to the model that had become my nemesis. If I didn’t have the patience and dexterity to do it now, then perhaps I should make my peace that I never would…
I cut the pieces from some A4 paper – the model is folded from 3 by 1 rectangles. Each tetrahedron is made from 6 edges, so 30 rectangles cut from 10 squares of paper are needed in all. I folded the modules gradually in spare moments until all 30 were ready to assemble. Then I put together the first two tetrahedra and got stuck again. It was the evening before Big MathsJam, and I thought to myself how lovely it would be if I could start my 2020 talk tying up the loose end from 2019. That gave me the motivation I needed. I read Michal Kosmulski’s assembly tips, and then sat at my desk manipulating paper and comparing it with the diagrams. I got a third tetrahedron in, then a fourth, and finally, all five were together! I then proceeded to tell everyone I could think of, including Twitter!
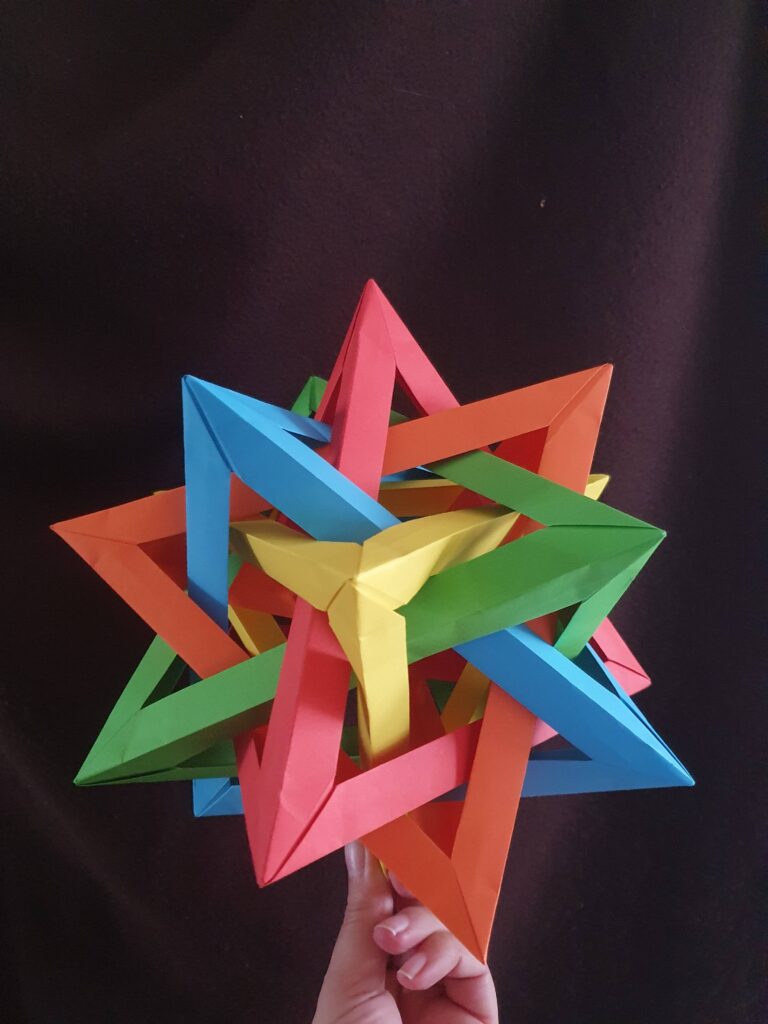
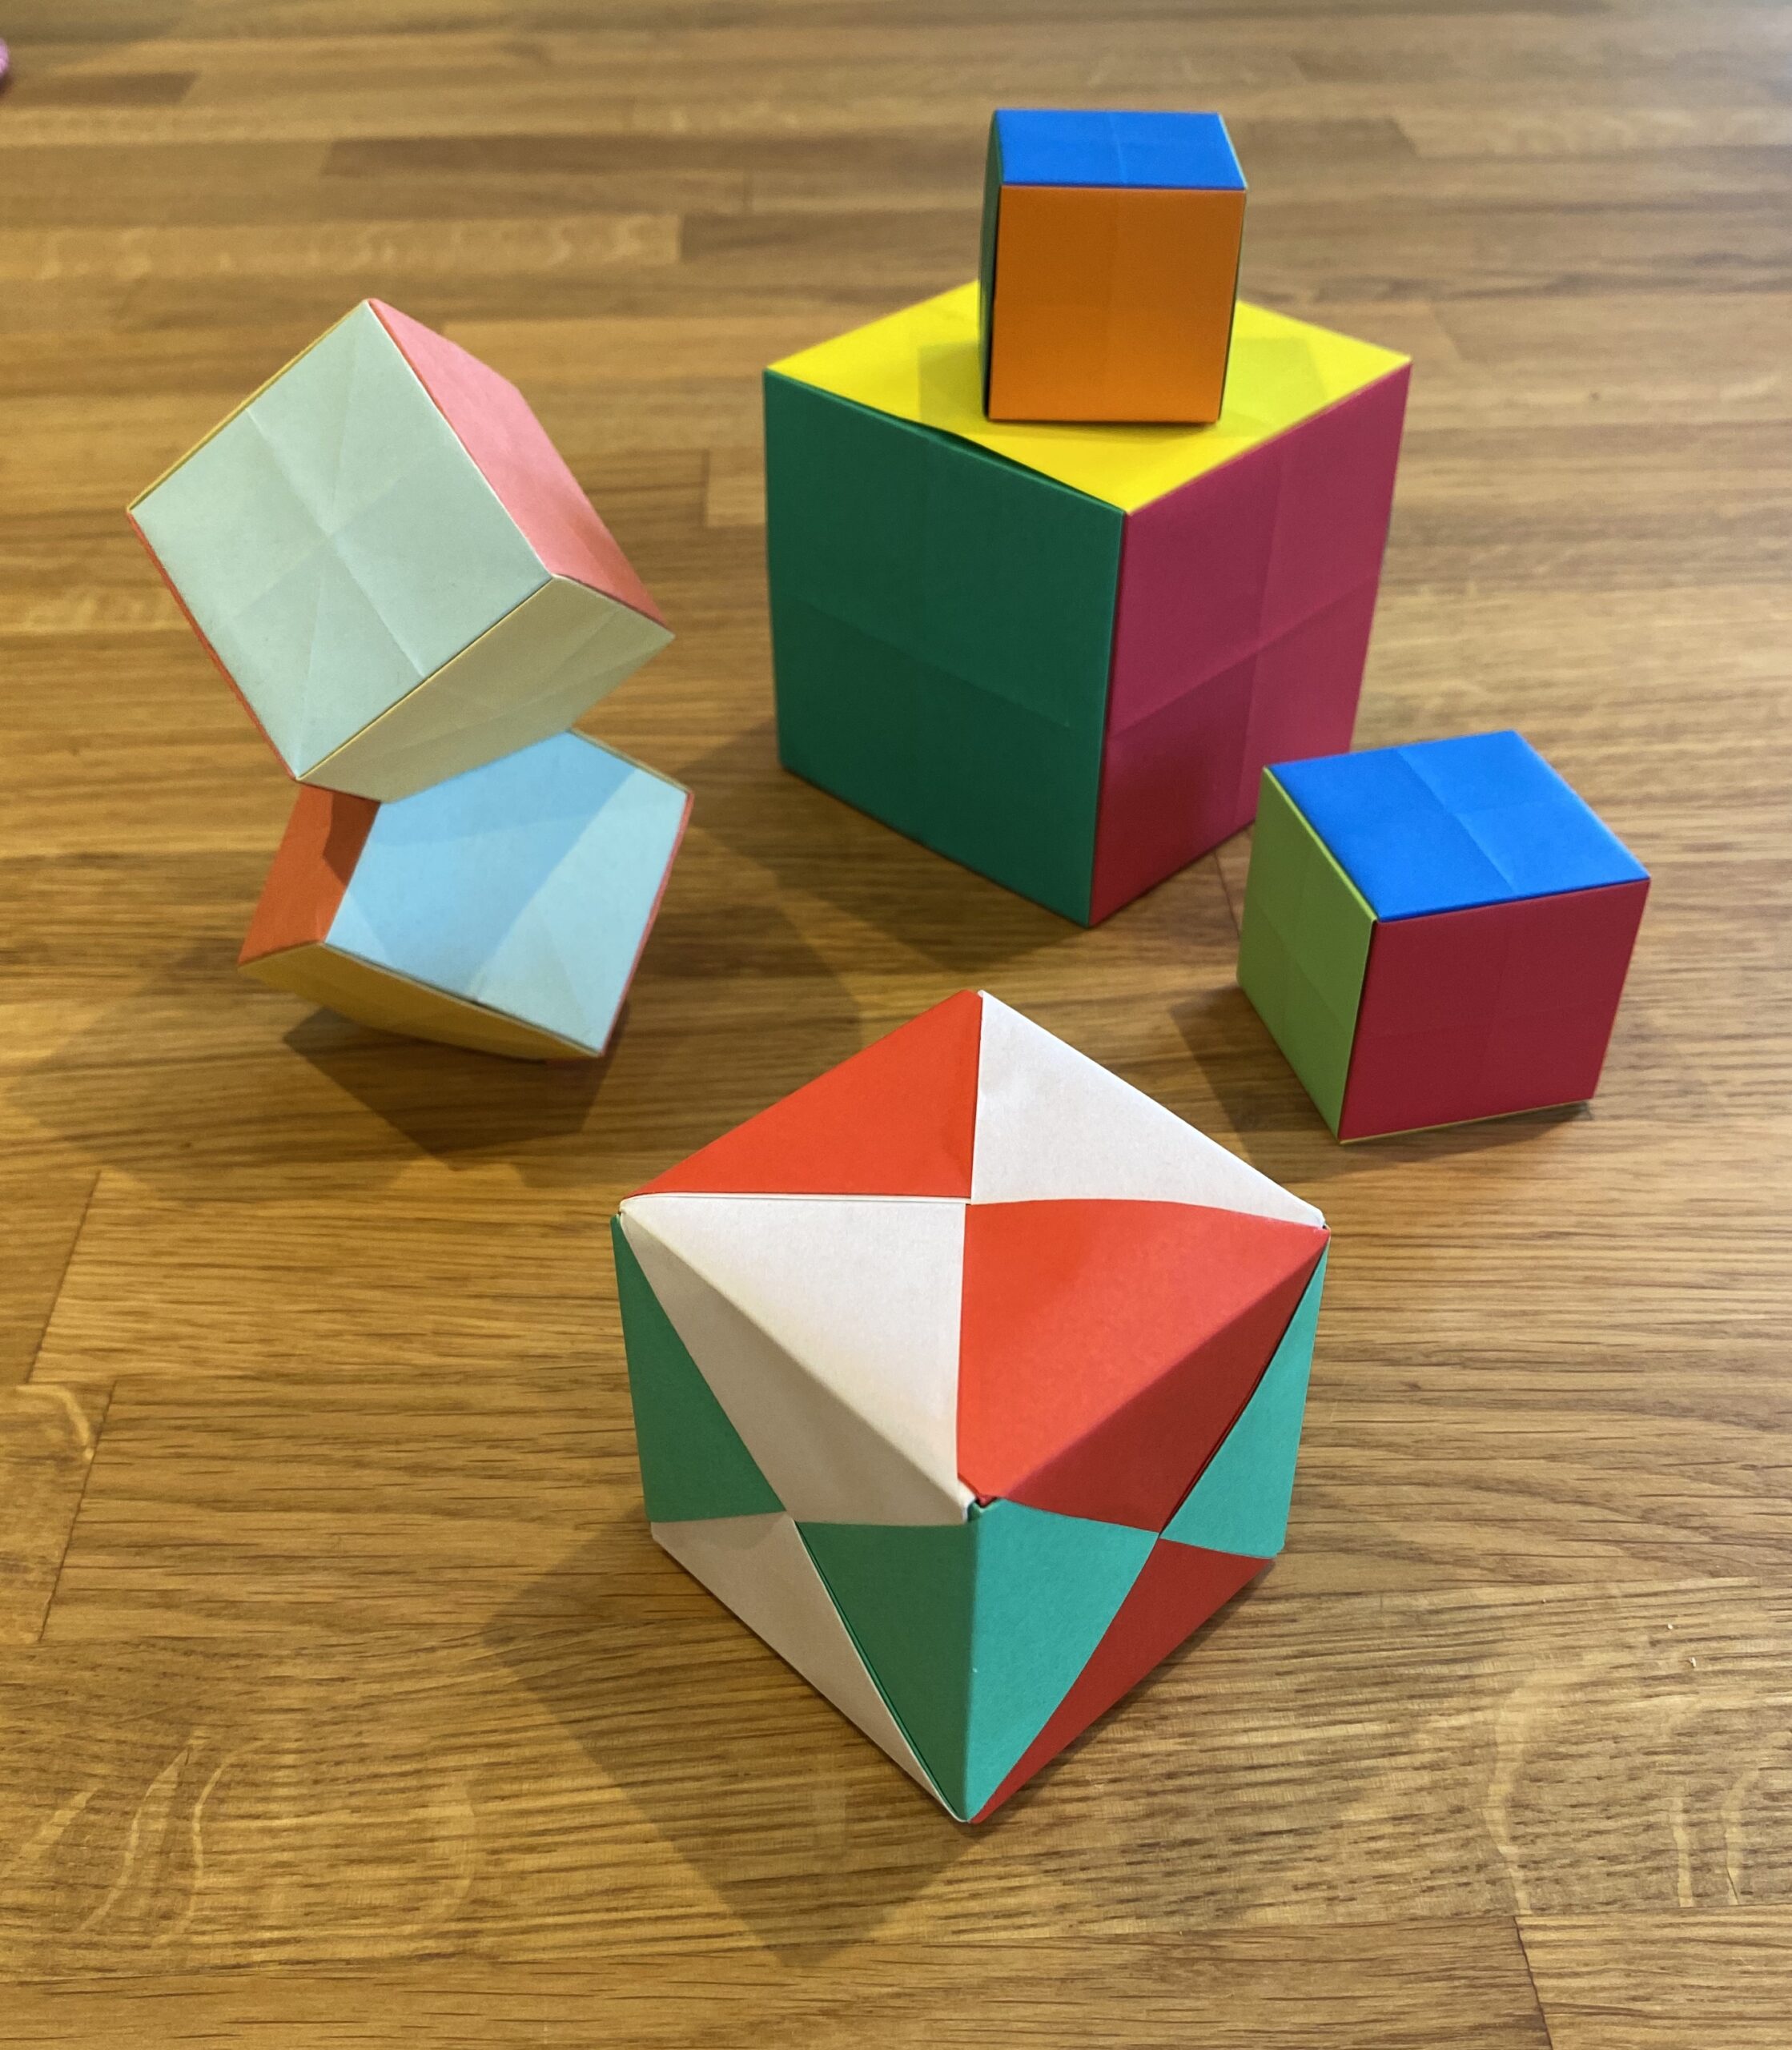
So, what advice would I offer someone else who wanted to make this model? Well, first of all, it’s much easier to make it once you’ve already made it! Having an actual 3D real life model to compare it to made the assembly of my second, third and fourth attempts much smoother than the first one. (Yes, I’ve got an origami problem. Yes, I’ve stopped making them now. Yes, I would make another one given half a chance.) For your first model though, it really does help to look at someone else’s diagram, so here’s a photo of one of mine with some notes that might be useful.
Note how the yellow point emerges through the orange face. Imagine the orange point protruding through the yellow face on the opposite side of the model. Note also how the remaining three colours weave themselves around the three yellow edges, in a sort of knot. Put these edges in place, and then make the visible points, and then finally turn the model round to complete the faces – I found it easier to make sense of the symmetry by building the third, fourth and fifth tetrahedra together rather than one by one.
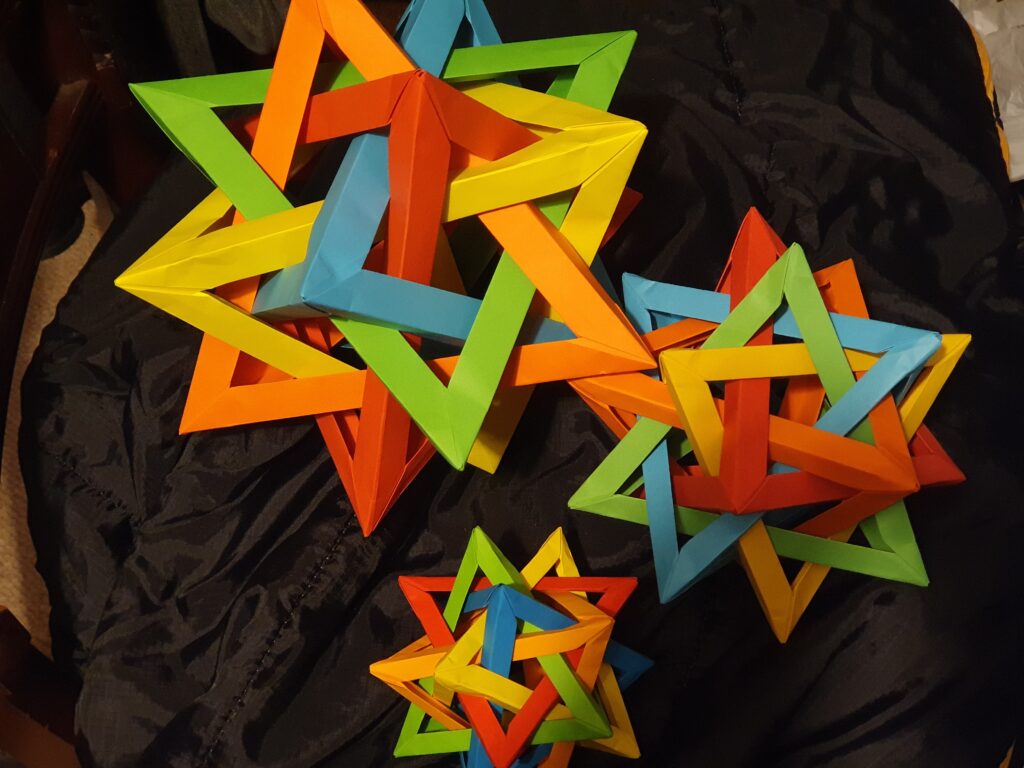
If you’re a fan of modular origami and you have the patience to tackle a complicated model, (or the three-dimensional thinking to make it easier to visualise the assembly), I think it’s definitely worth making at least once. I made a version from shiny paper which I suspect will adorn my Christmas tree for quite a few years to come. Origami is a great tool for helping young people understand the importance of care, precision and perseverance, and while I wouldn’t necessarily teach this model in an origami workshop, I will certainly use it as an example to inspire!
Earlier this month I ran a couple of workshops to help people get started with the amazing free software GeoGebra. If you’re not familiar with GeoGebra, it’s a bit difficult to sum up in just a few words as it does so much! I first knew it as a dynamic geometry package but it also does 3D graphics, has a built-in spreadsheet, a computer algebra system and many more features – the more I use it, the more I discover.
In my workshops we looked at how to create snowflakes (coming up in a future post) and stars. In this post I’m going to share another way of creating stars in GeoGebra which we didn’t cover in the workshop.
To make the animated 13-pointed stars shown above, first I specified a point which I called “B” with the coordinates (1,0). Then I created the slider “a” which gives integer values from 1 to 6. The rest of the star was done with one (rather long) command. I used the Polygon command and then specified the 13 points using 12 Rotate commands. The first part of the long command was: Polygon(B,Rotate(B,a*360°/13),Rotate(B,2a*360°/13),Rotate(B,3a*360°/13)…) Each of the “Rotate” commands multiplies the position in the list by whatever the slider a is set to, and of course when the angle goes over 360° it just wraps around! This is a much neater method for drawing the polygon than my previous method which used modular arithmetic, although typing out all 12 rotations was a bit tedious. I think if I combined this with the method I shared in my recent workshop, which used a spreadsheet to create a list of points, I could make a very nice interactive star exploration tool.
Some mathematical questions to consider: This family of stars has 13 points, and the slider went up to 6. What would happen if the slider went beyond 6? What if I made stars with fewer or more points instead? I initially started with 9 points but some of the stars were quite boring – what do you think the star looked like when I set “a” to 3?
If you’ve never played around with GeoGebra before, I urge you to have a go. https://www.geogebra.org/classic gives you everything you need to start exploring in your browser, and you can also download versions for desktop. I even have the phone app for emergency geometrical diagrams on the go! I’m hoping to run some more GeoGebra workshops in the spring so look out for news of them on Twitter, or if you would like me to run a bespoke GeoGebra workshop just for you and your school or organisation, get in touch!
A method to trisect angles using origami, and a paper protractor
Big MathsJam 2020 was somewhat different from usual, as with many things this year. Rather than meeting up in Staffordshire, we instead met in a virtual space and gave all our talks as a video conference. I decided to share a couple of my favourite paper folding tricks that I’d been meaning to write up for my blog for quite some time. More than a month later, here’s the writeup!
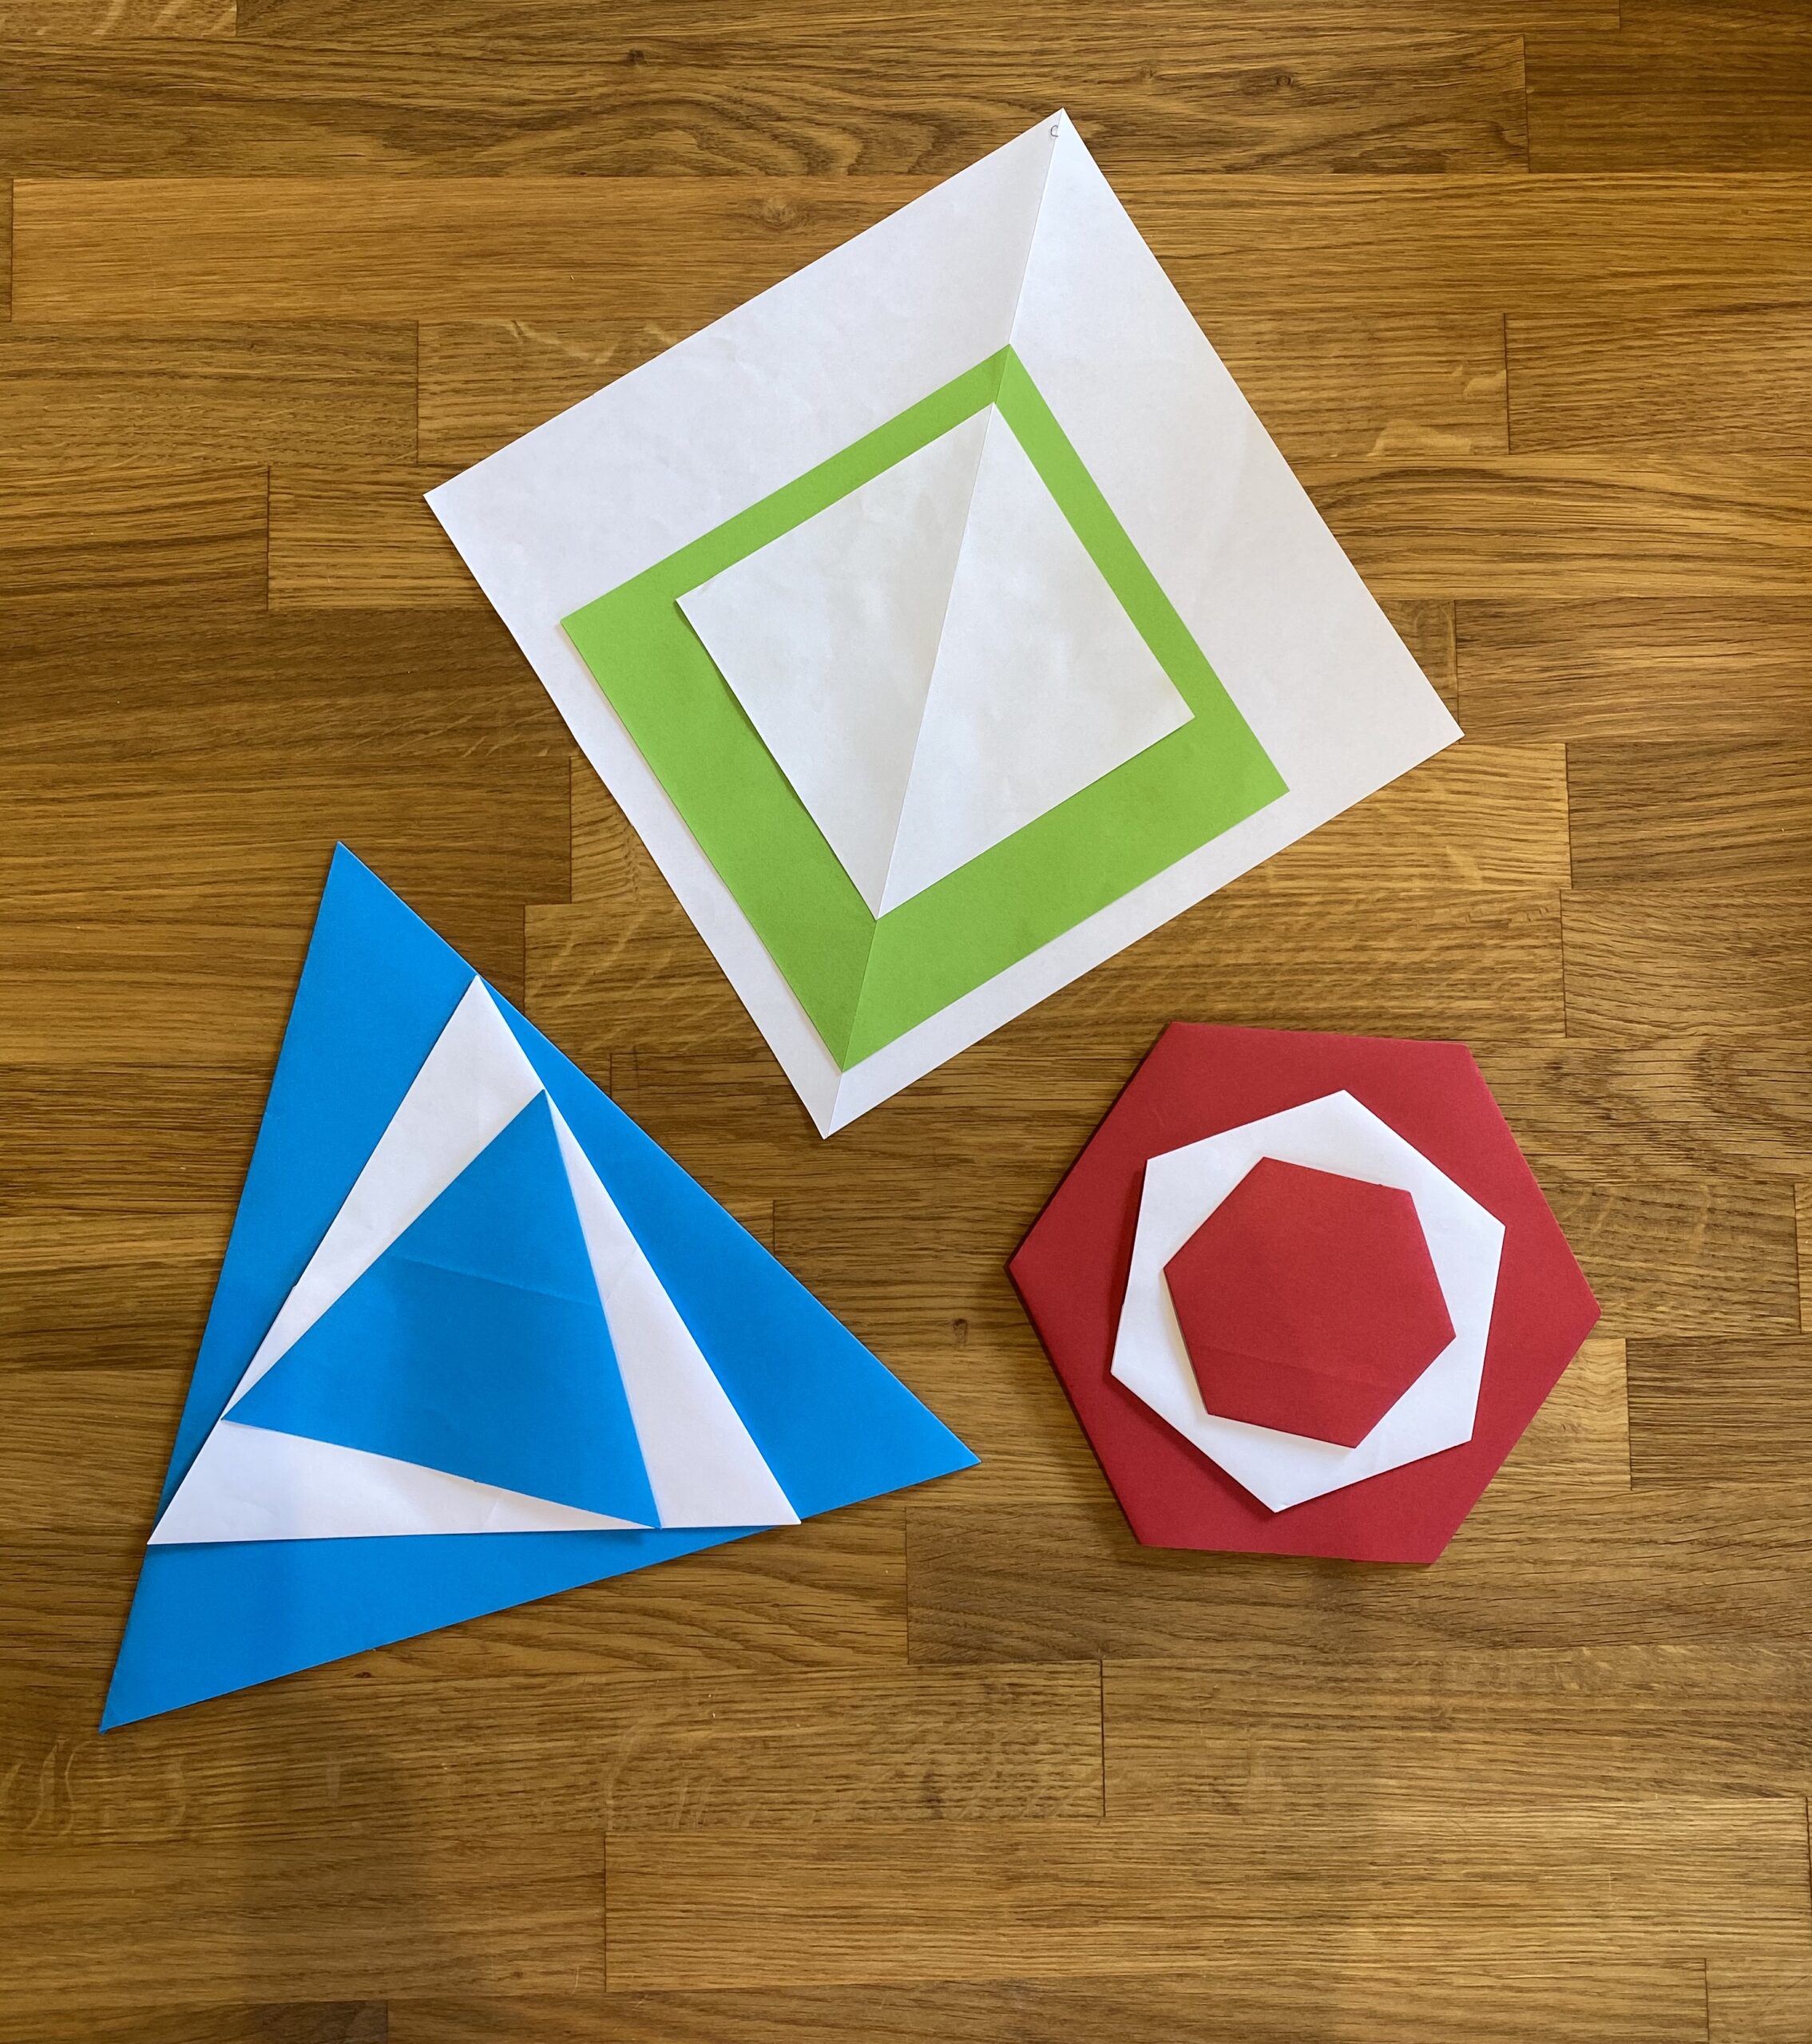
The first technique to share is folding 60° from a rectangular sheet of paper. This fold is fairly well known and is one of my favourite pieces of mathematical origami – it can be used to make an equilateral triangle which can then be the starting point for many other constructions.
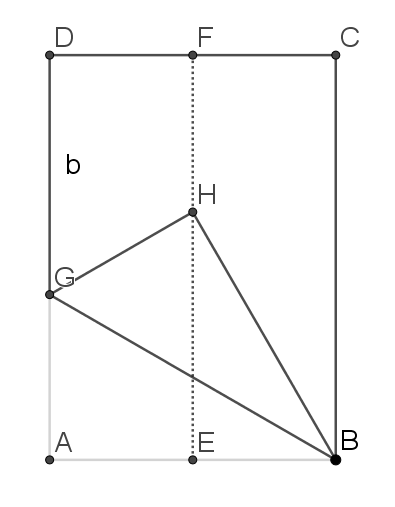
Start with a rectangle of paper and fold it in half lengthways (forming the line EF shown in the diagram).
Then lift up corner A, hold your finger on corner B, and move A up to meet the folded line EF, so that point A becomes point H.
Claim: Angle GBC is 60°.
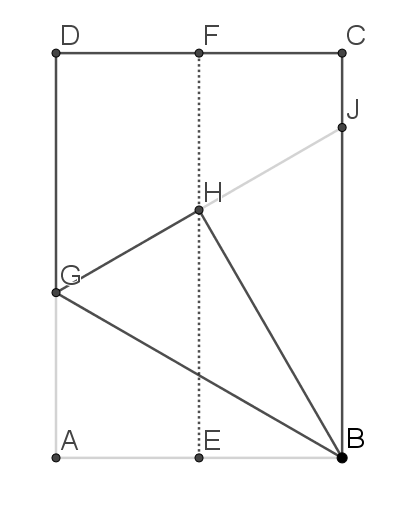
How do we know it’s a 60° angle? Well we can continue the line GH:
GAB and GHB are congruent triangles because when we fold they are literally the same triangle! JHB is also congruent; since H lies on the line of symmetry of the paper, GH and HJ are equal in length, and we know that angle GHB is a right angle because it is the corner of the paper, so JHB is also a right angle. HB is common to both triangles so they must be congruent. This means that angles ABG, GBH and HBJ are all equal, and since they sum to 90° they must each be 30°. So triangle GBJ is equilateral.
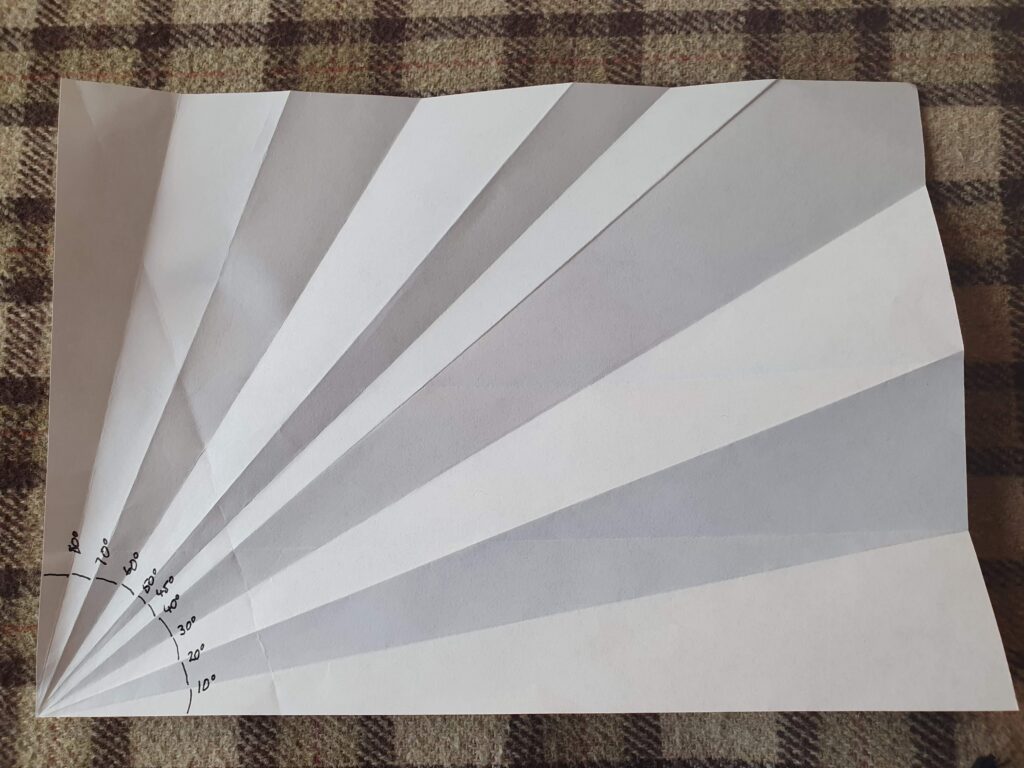
The next step to making a protractor from origami is to trisect our 60° angle. It is well known that arbitrary angles can’t be trisected using a straight edge and compasses, but it turns out origami allows us more freedom and so there is a trisection method using paper folding! I followed the instructions from this Plus article.
Trisecting 60° gives us 20°, and bisecting an angle is easy using origami, so we can get 10° and if we’re careful and use thin enough paper we can get 5° too. So the next time you need to measure an angle and you don’t have a protractor but you do have a sheet of paper, get folding!
I don’t make a Christmas cake every year, but most years since the mid 1990s one of my Christmas traditions has been to dig out the recipe handed down to me from Grandma Kiddle and weigh out a small mountain of dried fruit, soak it overnight in brandy, and then mix butter, sugar, eggs, flour and bake for several hours. Then over the following days and weeks I gradually introduce spoonfuls of brandy into the cake, before covering it with marzipan, royal icing, and some tatty little plastic decorations that I’ve had for years. My final Christmas Cake tradition is to take the cake with me when visiting various family who don’t make their own, and cut a chunk off for them to enjoy. What’s left goes home with me after Christmas where I eat a couple of slices and then get sick of Christmas cake, push the tin to the back of the kitchen worktop and forget about it, and then rediscover it later in the year to find it’s still perfectly edible because Christmas cake Never Goes Off!
This Christmas, like the year that led up to it, has been very different from previous ones. I still wanted to make cake, but I knew it was unlikely I could visit all the family who usually get a chunk of cake. Added to this, certain family members prefer their cake without icing, so I started to come up with a cunning plan. Instead of making one large cake and cutting chunks off, I would make smaller cakes, which could then be iced or not to people’s preferences! This is where the maths comes in…
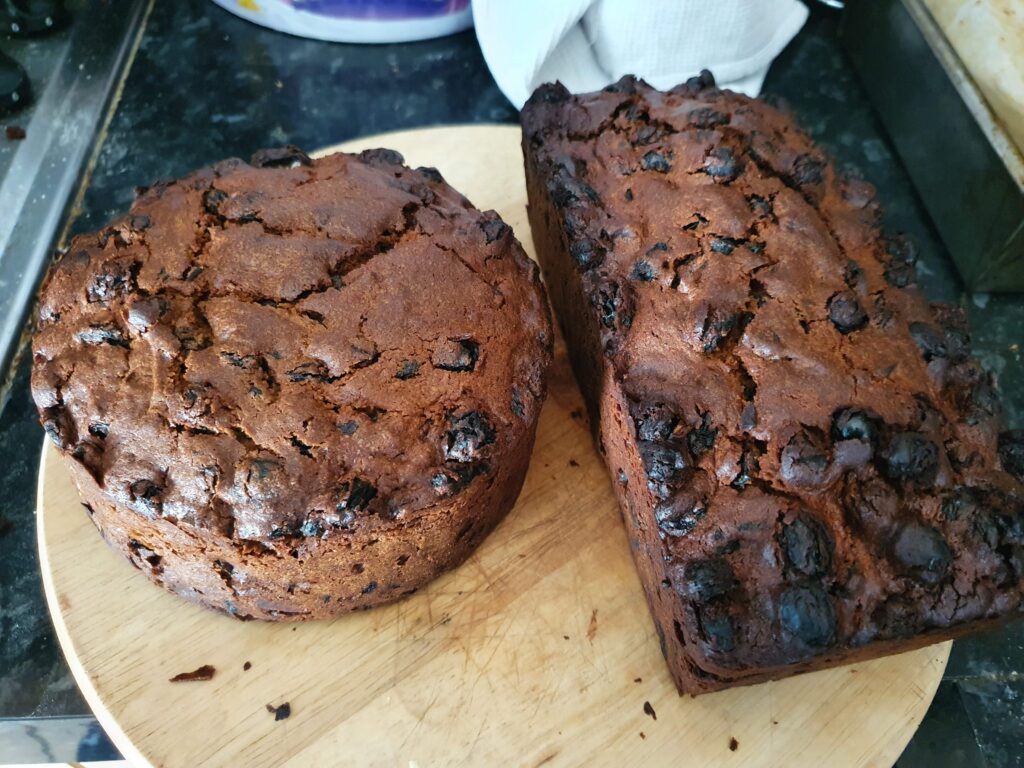
The recipe I follow makes enough mix for an 8 inch diameter round cake tin. I was limited in what tins I had available; I dug through the kitchen cupboards and found I had a 6 inch round tin, various square tins and a loaf tin. I could have worked out volumes and then scaled the recipe but instead I decided to try to find a pair of tins that got me close to the same base area – the tins were all approximately the same height so I could do all my calculations with area rather than volume.
Approximating π as 3, my 8 inch cake tin has a base area of 4×4×3=48 square inches. The 6 inch cake tin has a base area of 3×3×3=27 square inches. This means I had 21 square inches to play with for the second cake, without needing to do any recipe scaling. Luckily one of my loaf tins is around 8 inches long and around 2½ inches wide, giving a base area of approximately 20 square inches (it tapers out but I figured that my approximations were only ballpark figures and the worst that could happen was a cake that was a bit flatter than I planned – it would still taste alright!)
The only other recalculation that two small cakes required was in cooking time. The 8 inch cake takes 3½ hours to cook, so I figured my two small cakes would need a bit less than that. I dealt with this problem by checking the cakes after 2½ hours and testing with a skewer – they needed a little longer and were done in about 3 hours in the end. The round cake was subsequently marzipanned and iced, to be enjoyed by me over the coming weeks, and the loaf cake was divided into 2 squareish chunks and sent off without icing to be enjoyed by family. It all worked out rather well, and I suspect my new Christmas tradition will be to make two smaller cakes every year from now on!
A very mathematical song with plenty of interesting questions to analyse.
When I am making mince pies, I often put Christmas songs on and have a sing-along. “The Twelve Days of Christmas” is a brilliant song for me to sing along to, because even if I can’t remember all the words when the song starts, the repetition guarantees I will have learned them all by the end!
It is well known to recreational mathematicians and maths educators that there is a pleasing result when you add together the cumulative total of gifts mentioned in the song – if you’ve never worked it out, have a think about how you might calculate it before reading on…
On the first day, there’s 1 gift; on the second, 2+1; on the third, 3+2+1, and so on. This gives us the sum of the triangular numbers, also known as the tetrahedral numbers, for which there is a formula using binomial coefficients. Alternatively, you could calculate it using a spreadsheet: in the first column, put the numbers 1 to 12 to represent the gifts, and in the second column the numbers counting down from 12 to 1 to represent the number of days each gift is given. Then create a column for the total number of each gift: 12 partridges, 2×11=22 turtle doves, 3×10=30 French hens and so on. Summing this column gives the answer. Are the gifts enough to last all year? Not quite…
I was musing on this very mathematical song while I made my mince pies this year, and I started pondering what other questions might be interesting to explore. The triangular numbers emerge by considering the number of gifts on a particular day, and a natural generalisation might be to wonder how many gifts would be received if Christmas lasted for more than 12 days. There’s an opportunity then to explore inverses – on which day would I receive more than 1000 gifts in a single day? On which day would the cumulative total of gifts go over 1 million? Working out answers to questions like this requires us not just to be able to express relationships in a general form but also to work backwards to solve for an unknown.
As I was washing up after this year’s first batch of mince pie making, running out of breath after racing through the later verses of the song, another question occured to me – how far through the song will I be when I have done half the singing?
To answer that question I did a bit of mathematical modelling. The nth verse of the song begins with the line: “On the nth day of Christmas my true love sent to me”, and then has n lines. For the purposes of my model I will assume each line is equal in length. So the nth verse has n+1 lines. This means the total number of lines in the song is 2 + 3 + 4 + … + 11 + 12 + 13 = 90. So when I have sung 45 lines I’m about halfway there….
Working backwards, when will I get to the end of the 45th line? Well I happen to know 45 is the 9th triangular number, so the sum of all the numbers from 2 to 9 is approximately 45 (it’s actually 44) so I’m going to suggest that a reasonable approximation for the midpoint of the song is after I have sung the first eight verses. This approximation won’t be exact, because some of the lines are longer than others (in particular, I like to really go for it when I sing “Five go-old riiiiiings” so that line lasts a good long time!) However, I checked on my favourite music streaming site, where there is a recording of Bing Crosby singing the song. His version is timed at 3 minutes and 20 seconds, which is 200 seconds. He begins the ninth day of Christmas at 1 minute 43 seconds or 103 seconds. Not bad for a back-of-the-envelope approximation!
I’m finding it strange to believe that it’s been just over two months since my last day at NRICH, and the start of my fully freelance maths communication and education career! Two months in seems like a good time to do an update, so here goes…
Late August and early September was taken up with some question vetting work. I hadn’t done this sort of work before, and I have to say, I really enjoyed it! It gave me a lot more insight into the process of writing exam questions, I spend a big chunk of time just working through questions looking for snags, and the best bit was thinking about how students would approach the question and trying to be as imaginative as possible about how the question might break, before coming up with possible fixes. I am looking forward to finding opportunities to do this sort of work again in the future.
In September and early October I worked on a teacher guide and some lesson plans for the brilliant Mathigon website. If you haven’t checked out Mathigon you are missing a real treat – I keep discovering more and more “wow” moments as I click around the site. The little bit that I worked on can be found in the Polypad section – check out the teacher guide and lesson plans with suggestions on how to use the Polypad digital manipulatives. I’m looking into other areas of the Mathigon site that I can contribute towards – it’s so great to be able to play even a small part in creating “The Textbook of the Future”.
The start of October was Maths Week in Scotland, and I was delighted to have the opportunity to contribute to the programme together with my good friend and fellow maths-freelancer Fran Watson. Fran and I worked together when we were both at NRICH, and being able to continue that working relationship has been hugely supportive to me as I make the transition to freelance. We were delighted that several hundred people tuned in to our Maths Origami live streams, where we shared some folds that explored 3D shape and symmetry. Following on from this success, Fran has persuaded me to team up again for Maths Week England next week – this time, instead of doing a stream targeted at younger students we are putting on an after school event that will be ideal for teachers but also older students or any interested adult who wants to explore how maths and origami are related! We are running it using a “pay-what-you-can” model so that we can cover our costs but keep it open to as many people as we can – check out the Eventbrite page for more details.
I was invited to lead a session for the London ATM/MA branch on October 10th, so I put together a set of problems and musings on the topic “Using Patterns and Structure to develop Algebraic Thinking”. I really enjoyed thinking about what I wanted to say on this topic – it merits at least one blog post in its own right – but highlights were probably using it as an excuse to get the lego out and make some lego patterns for delegates to look at under the visualiser and speculate about how the sequences might continue! I do think that teaching Algebra in a way that links with patterns and structure should be part of every secondary maths teacher’s toolkit, and it’s something I’m very happy to offer teacher professional development on – if you’re reading this and you want to book me to work with you on this, get in touch!
I have also been very privileged this term to be able to work behind the scenes for the excellent Maths Inspiration online programme. If you’ve watched any of their shows this term, you’ll know they now have an excited interactive voting and commenting system – I have been helping out to make sure that all the votes open and close on time correctly, as well as reading all the comments to pass them on to the presenters. It’s a nice change of pace for me to be working on a live online event in a support capacity rather than presenting, and of course it means I get to watch some of my favourite maths presenters and pick up lots of tips and tricks! There are more shows coming up in November and early December so if you are a secondary teacher looking for enrichment opportunities for your GCSE and A Level classes, check out the Maths Inspiration website.
The rest of my time has been spent lining up projects for the next couple of months (as well as the usual admin and finance chores) – keep an eye on my Twitter feed if you want to know what I’m up to and can’t wait for the next update post. And of course I am still devoting some of my time to teaching – this term I have GCSE and A level students who I am tutoring online, though I do still have a bit of availability, so if you know anyone who is looking for a maths tutor, drop me a line!
As part of Maths Week Scotland, Fran Watson and Alison Kiddle are delighted to offer two free online interactive origami webinars aimed at 8-13 year olds.
The first event, 3D Shapes and their Properties, will take place on Thursday 1st October during the school day and is designed for whole classes to join in with their teachers. The second event, Understanding Symmetry, will take place on Saturday 3rd October and is designed for families to participate together.
These free events are open to children and young people anywhere in Scotland, thanks to support from the Maths Week Scotland small grants fund. Both webinars will be hosted on YouTube, and there will be opportunities to submit comments and questions to the presenters via an online form, as well as sharing photos of your origami creations! For more details about each webinar, and to sign up, please visit the booking pages.
Last weekend, it was Big MathsJam, and among the mathematical delights I sampled, there was a talk by Christian Lawson-Perfect about stacking cups. You can see a really quick version of his talk on the Aperiodical website. Before reading on, you might like to think about the problem a bit…
At the weekend, I went to a lovely party, and on finding out I was a mathematician, one of the other attendees shared a weight puzzle that I think I have come across before but never tried to solve. I have been thinking about it on and off since then, and I promised to the other party-goers that I’d share my solution once I got there, so here we go!
First of all then, the problem. You have 12 objects which look identical. 11 are the same weight; one is different, but we don’t know if it’s heavier or lighter. You have a set of balancing scales, and you can do up to three weighings. How do you determine the odd weight out and determine whether it’s heavier or lighter?
You might want to have a think about the problem for yourself before reading on.