This is an outline of a demonstration I prepared for Talking Maths in Public 2019.
You will need:
Several paper plates
Pens/pencils
Rulers
Scissors
Preparation:
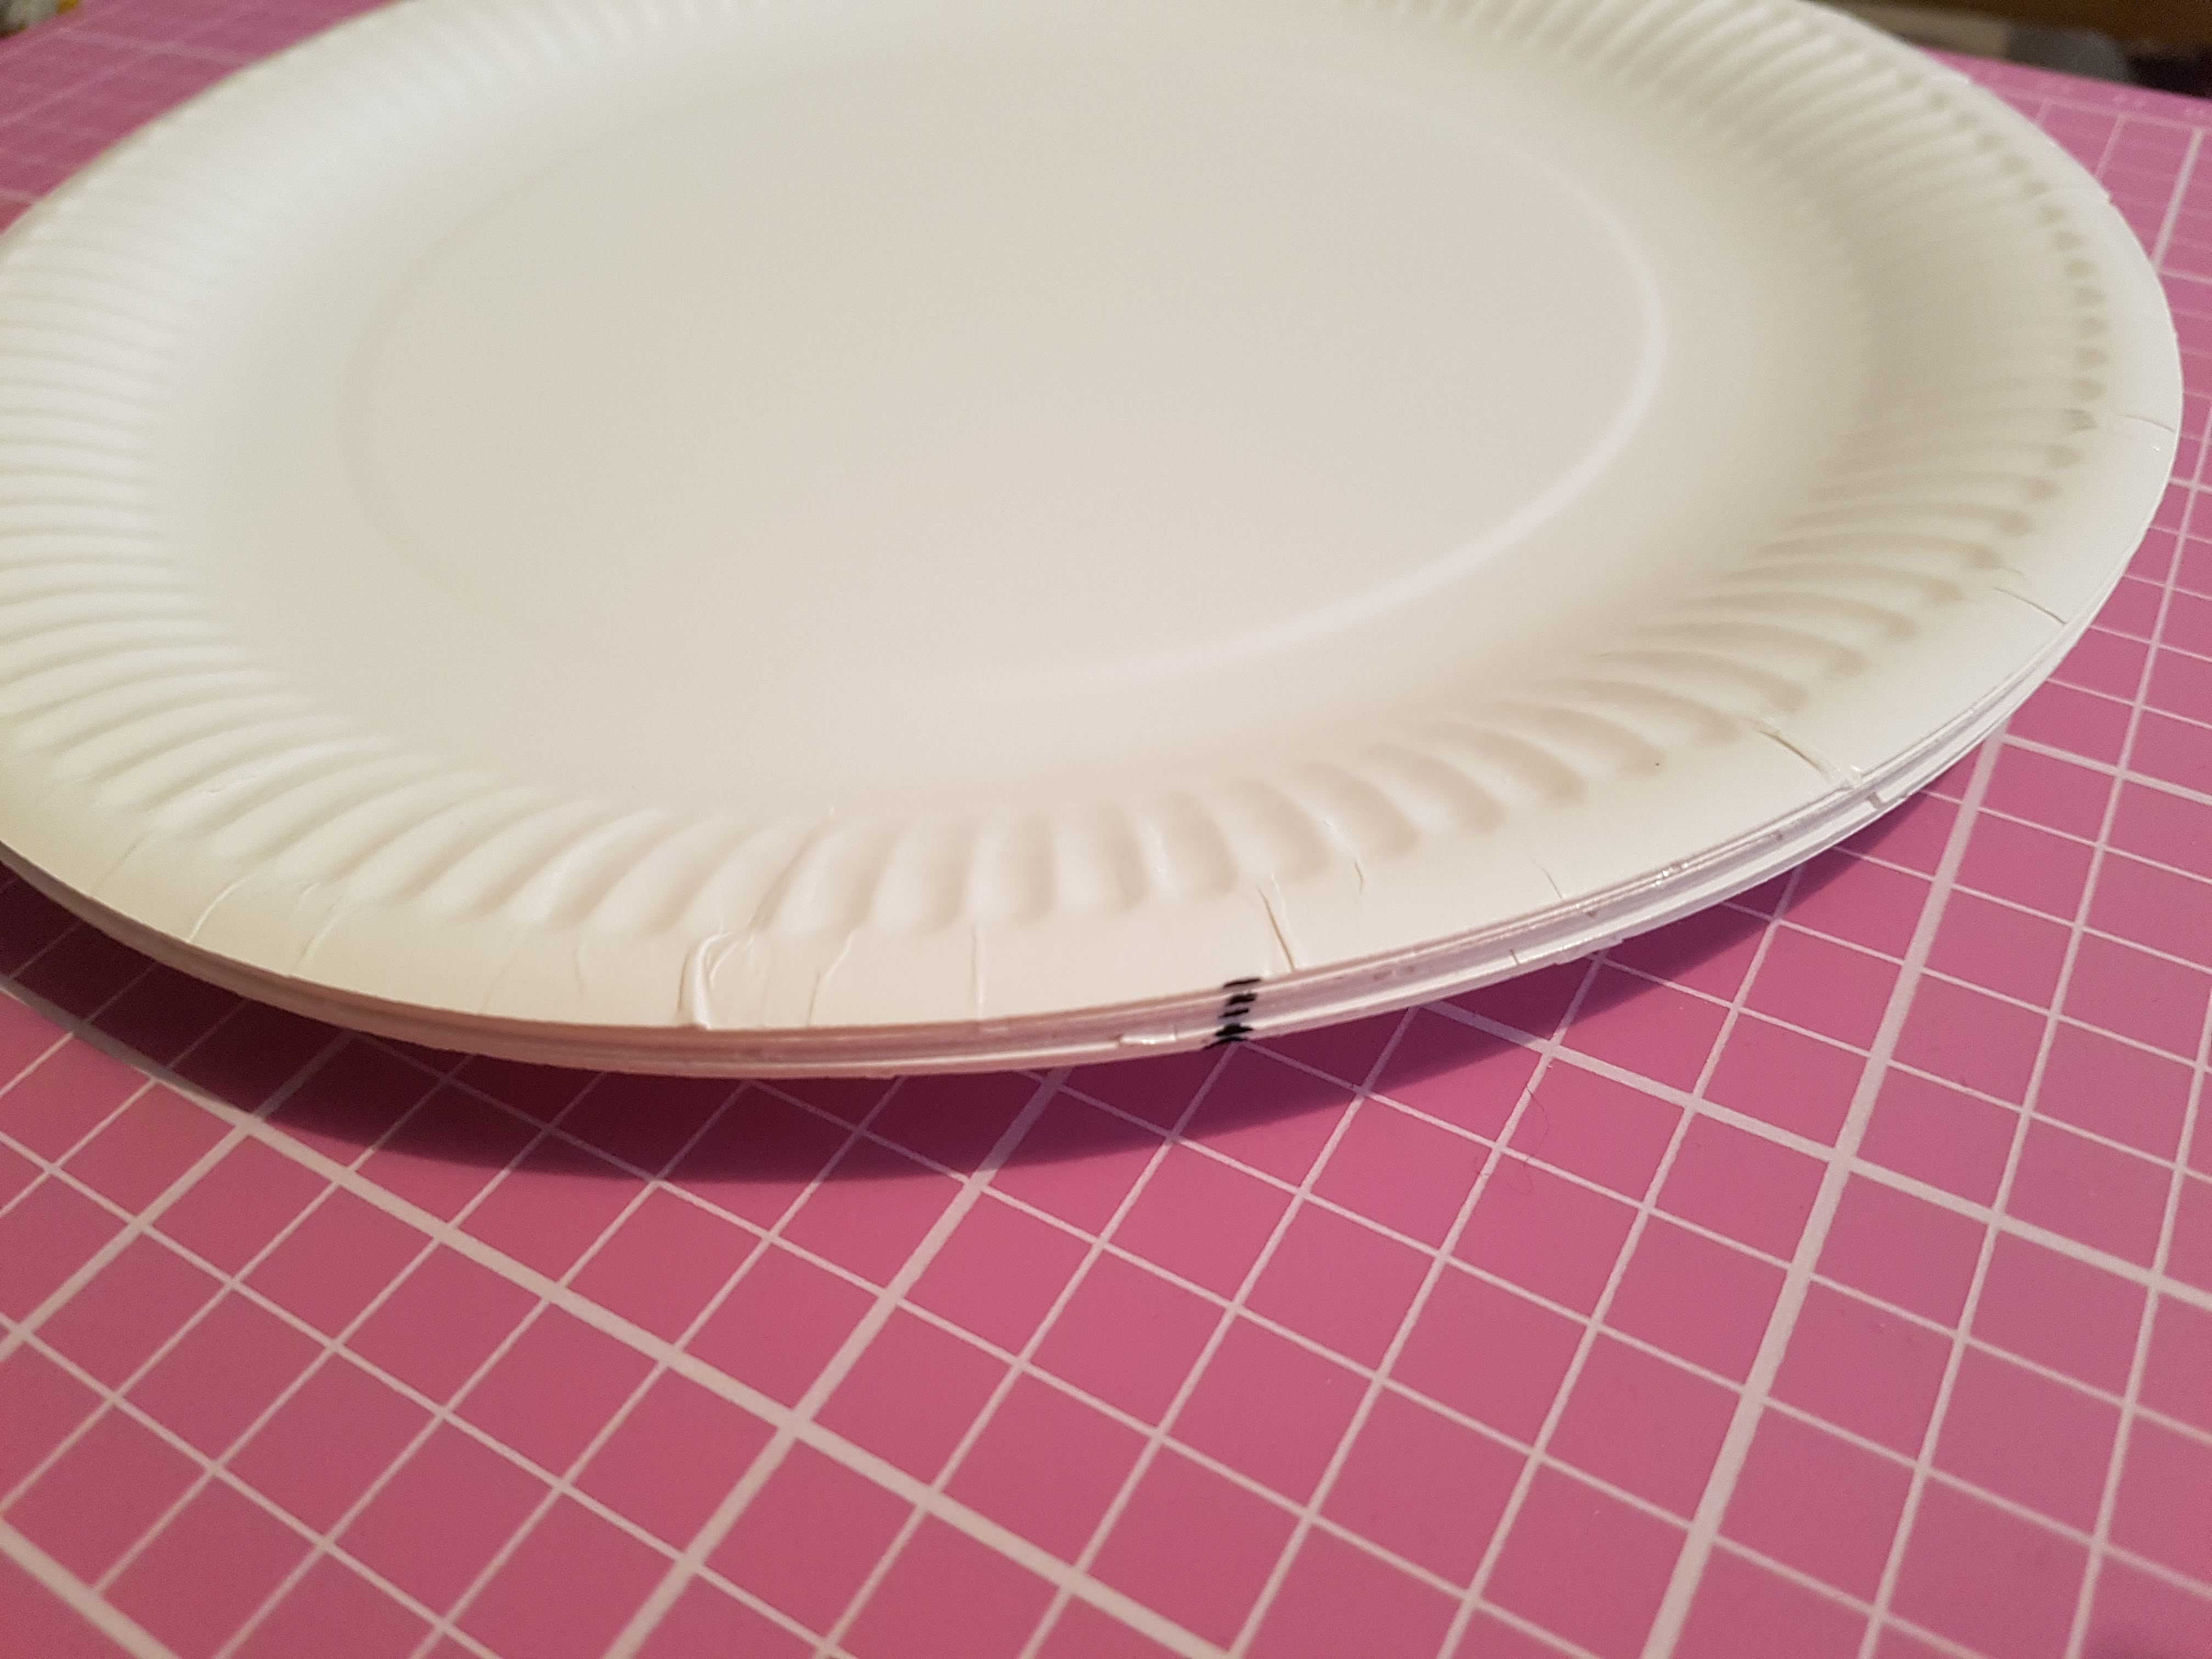
The demonstration requires several paper plates with the same chord marked on each. One way to do this is to draw a line in felt pen down the side of the stack of plates in two places, and then join the dots on each plate.
Demonstration:
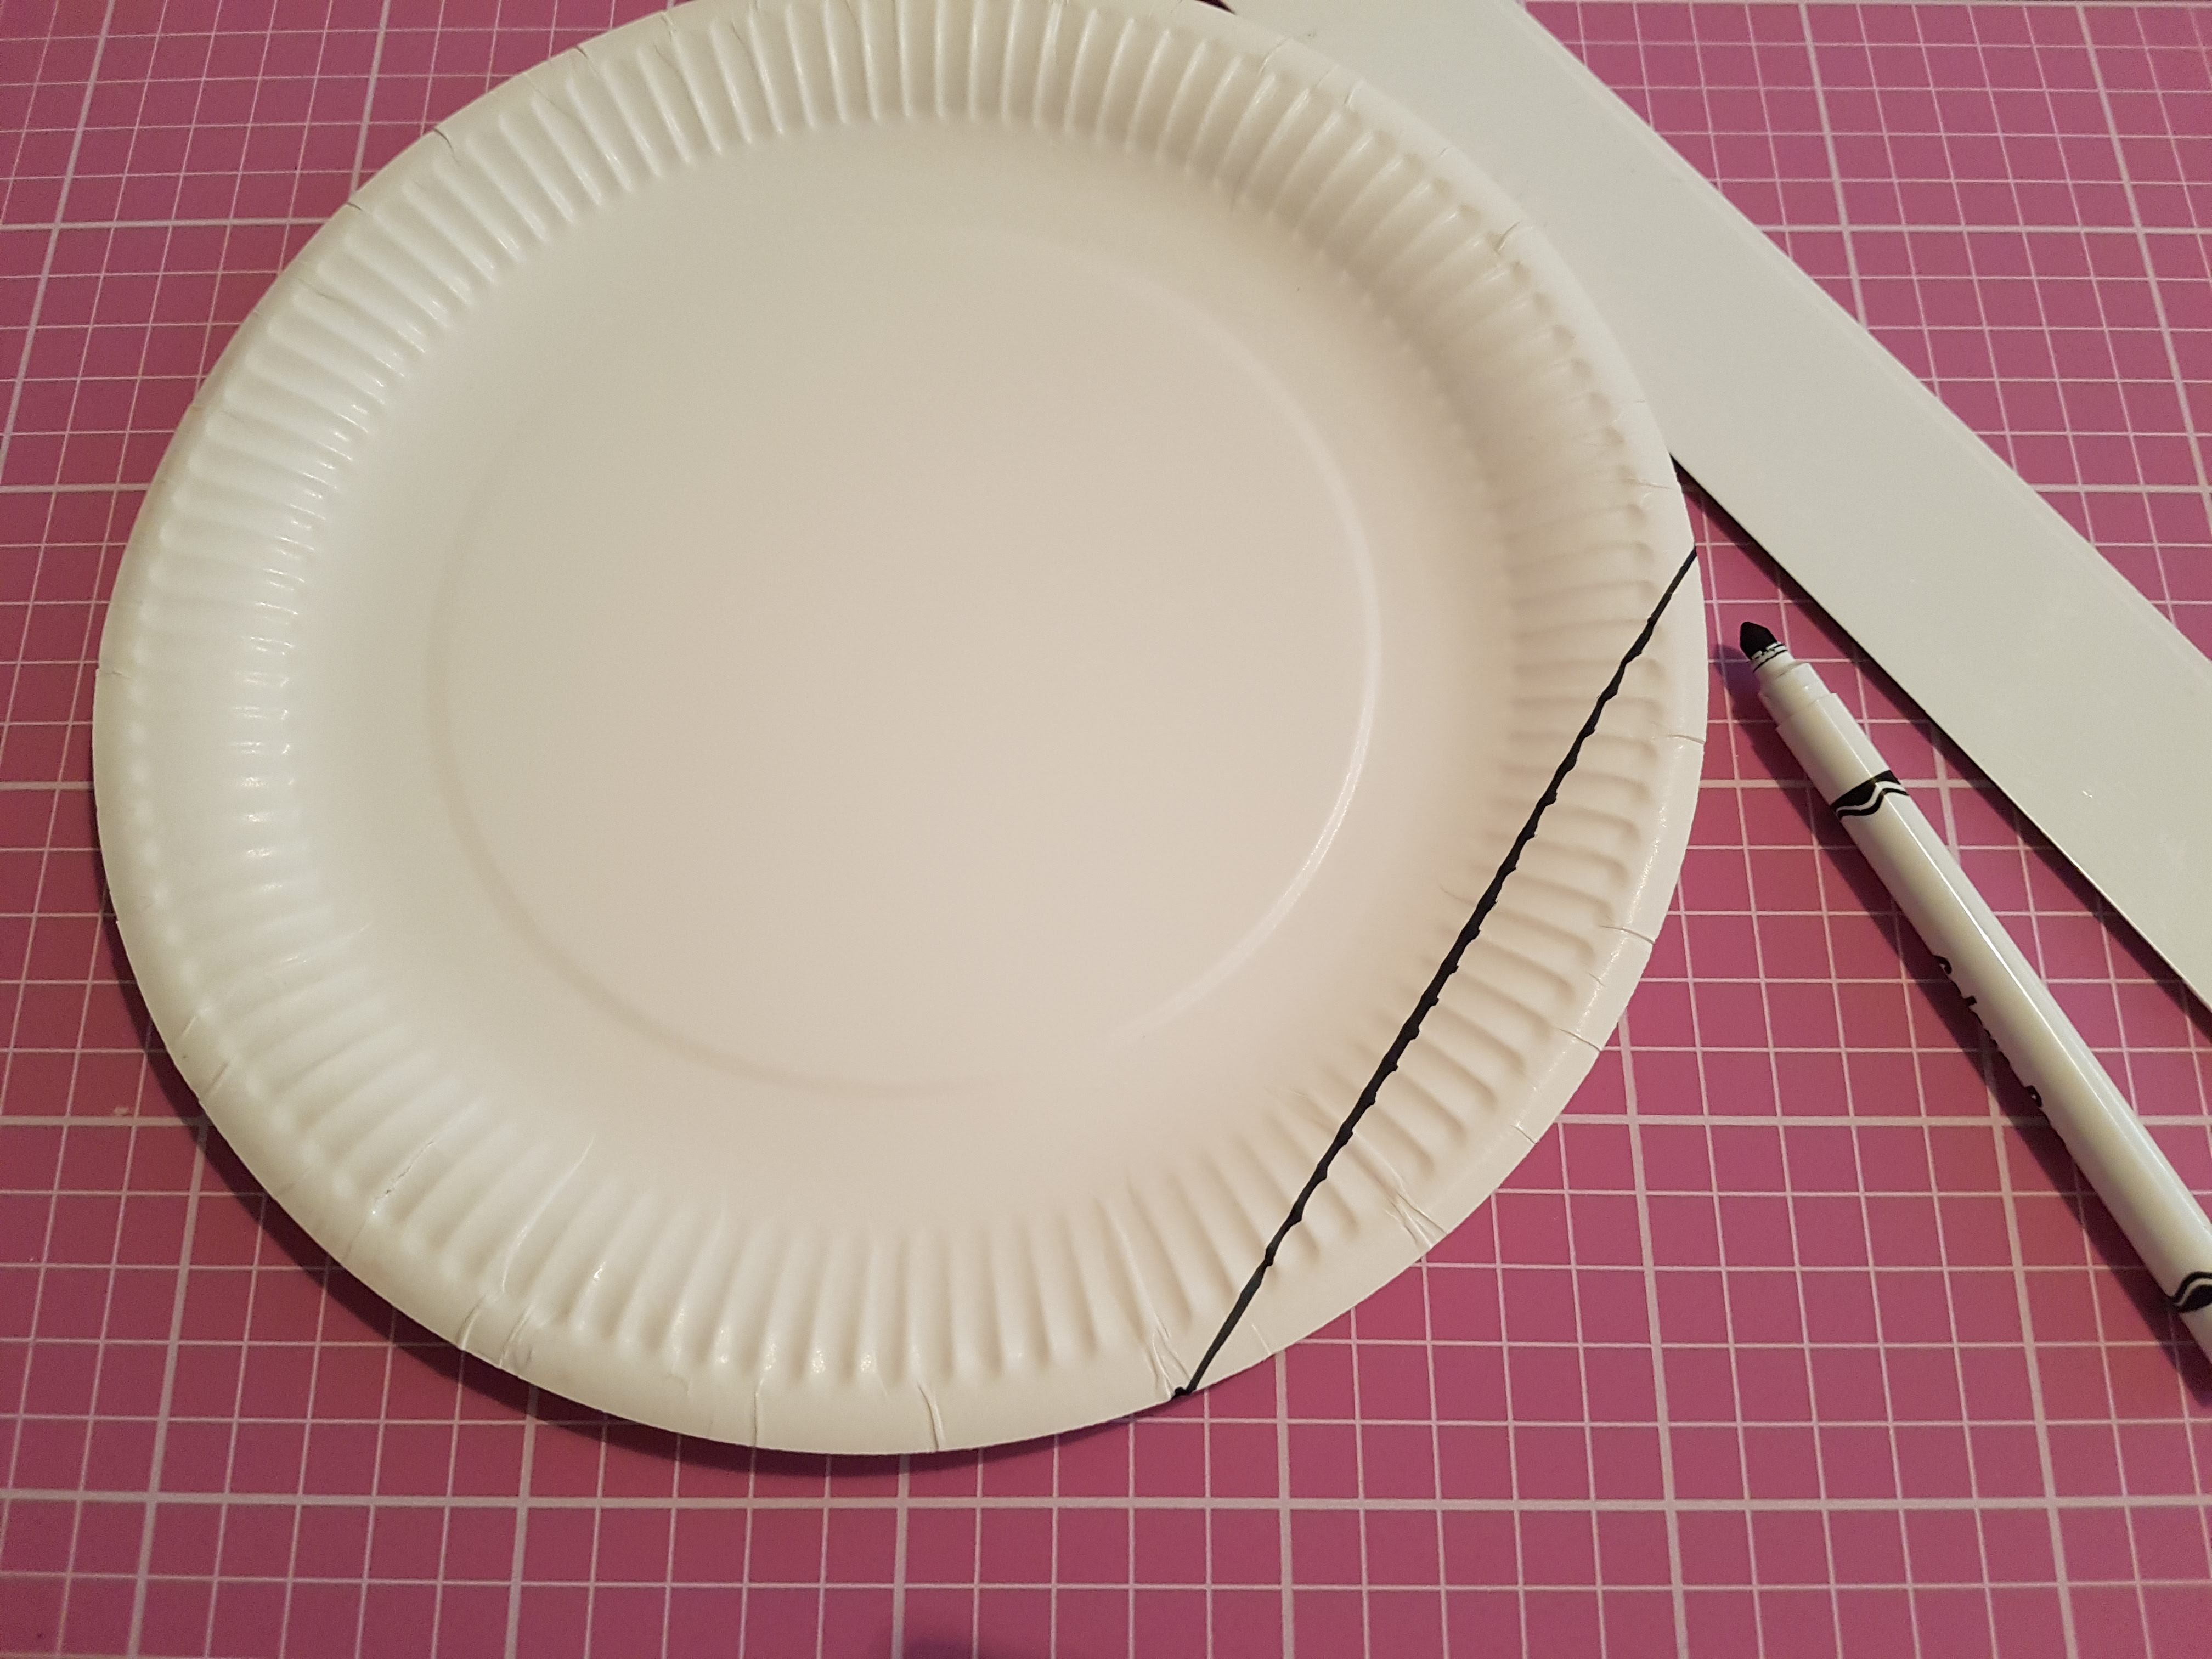
Invite two or three volunteers to take one of the prepared paper plates each. Each volunteer chooses a point somewhere around the edge of the plate (make sure they all choose a point in the larger of the two segments). Next, instruct them to join the ends of the chord to their chosen point, to form a triangle. Each volunteer will then need to cut along the two lines they have drawn – supervision will be required for younger children using scissors.
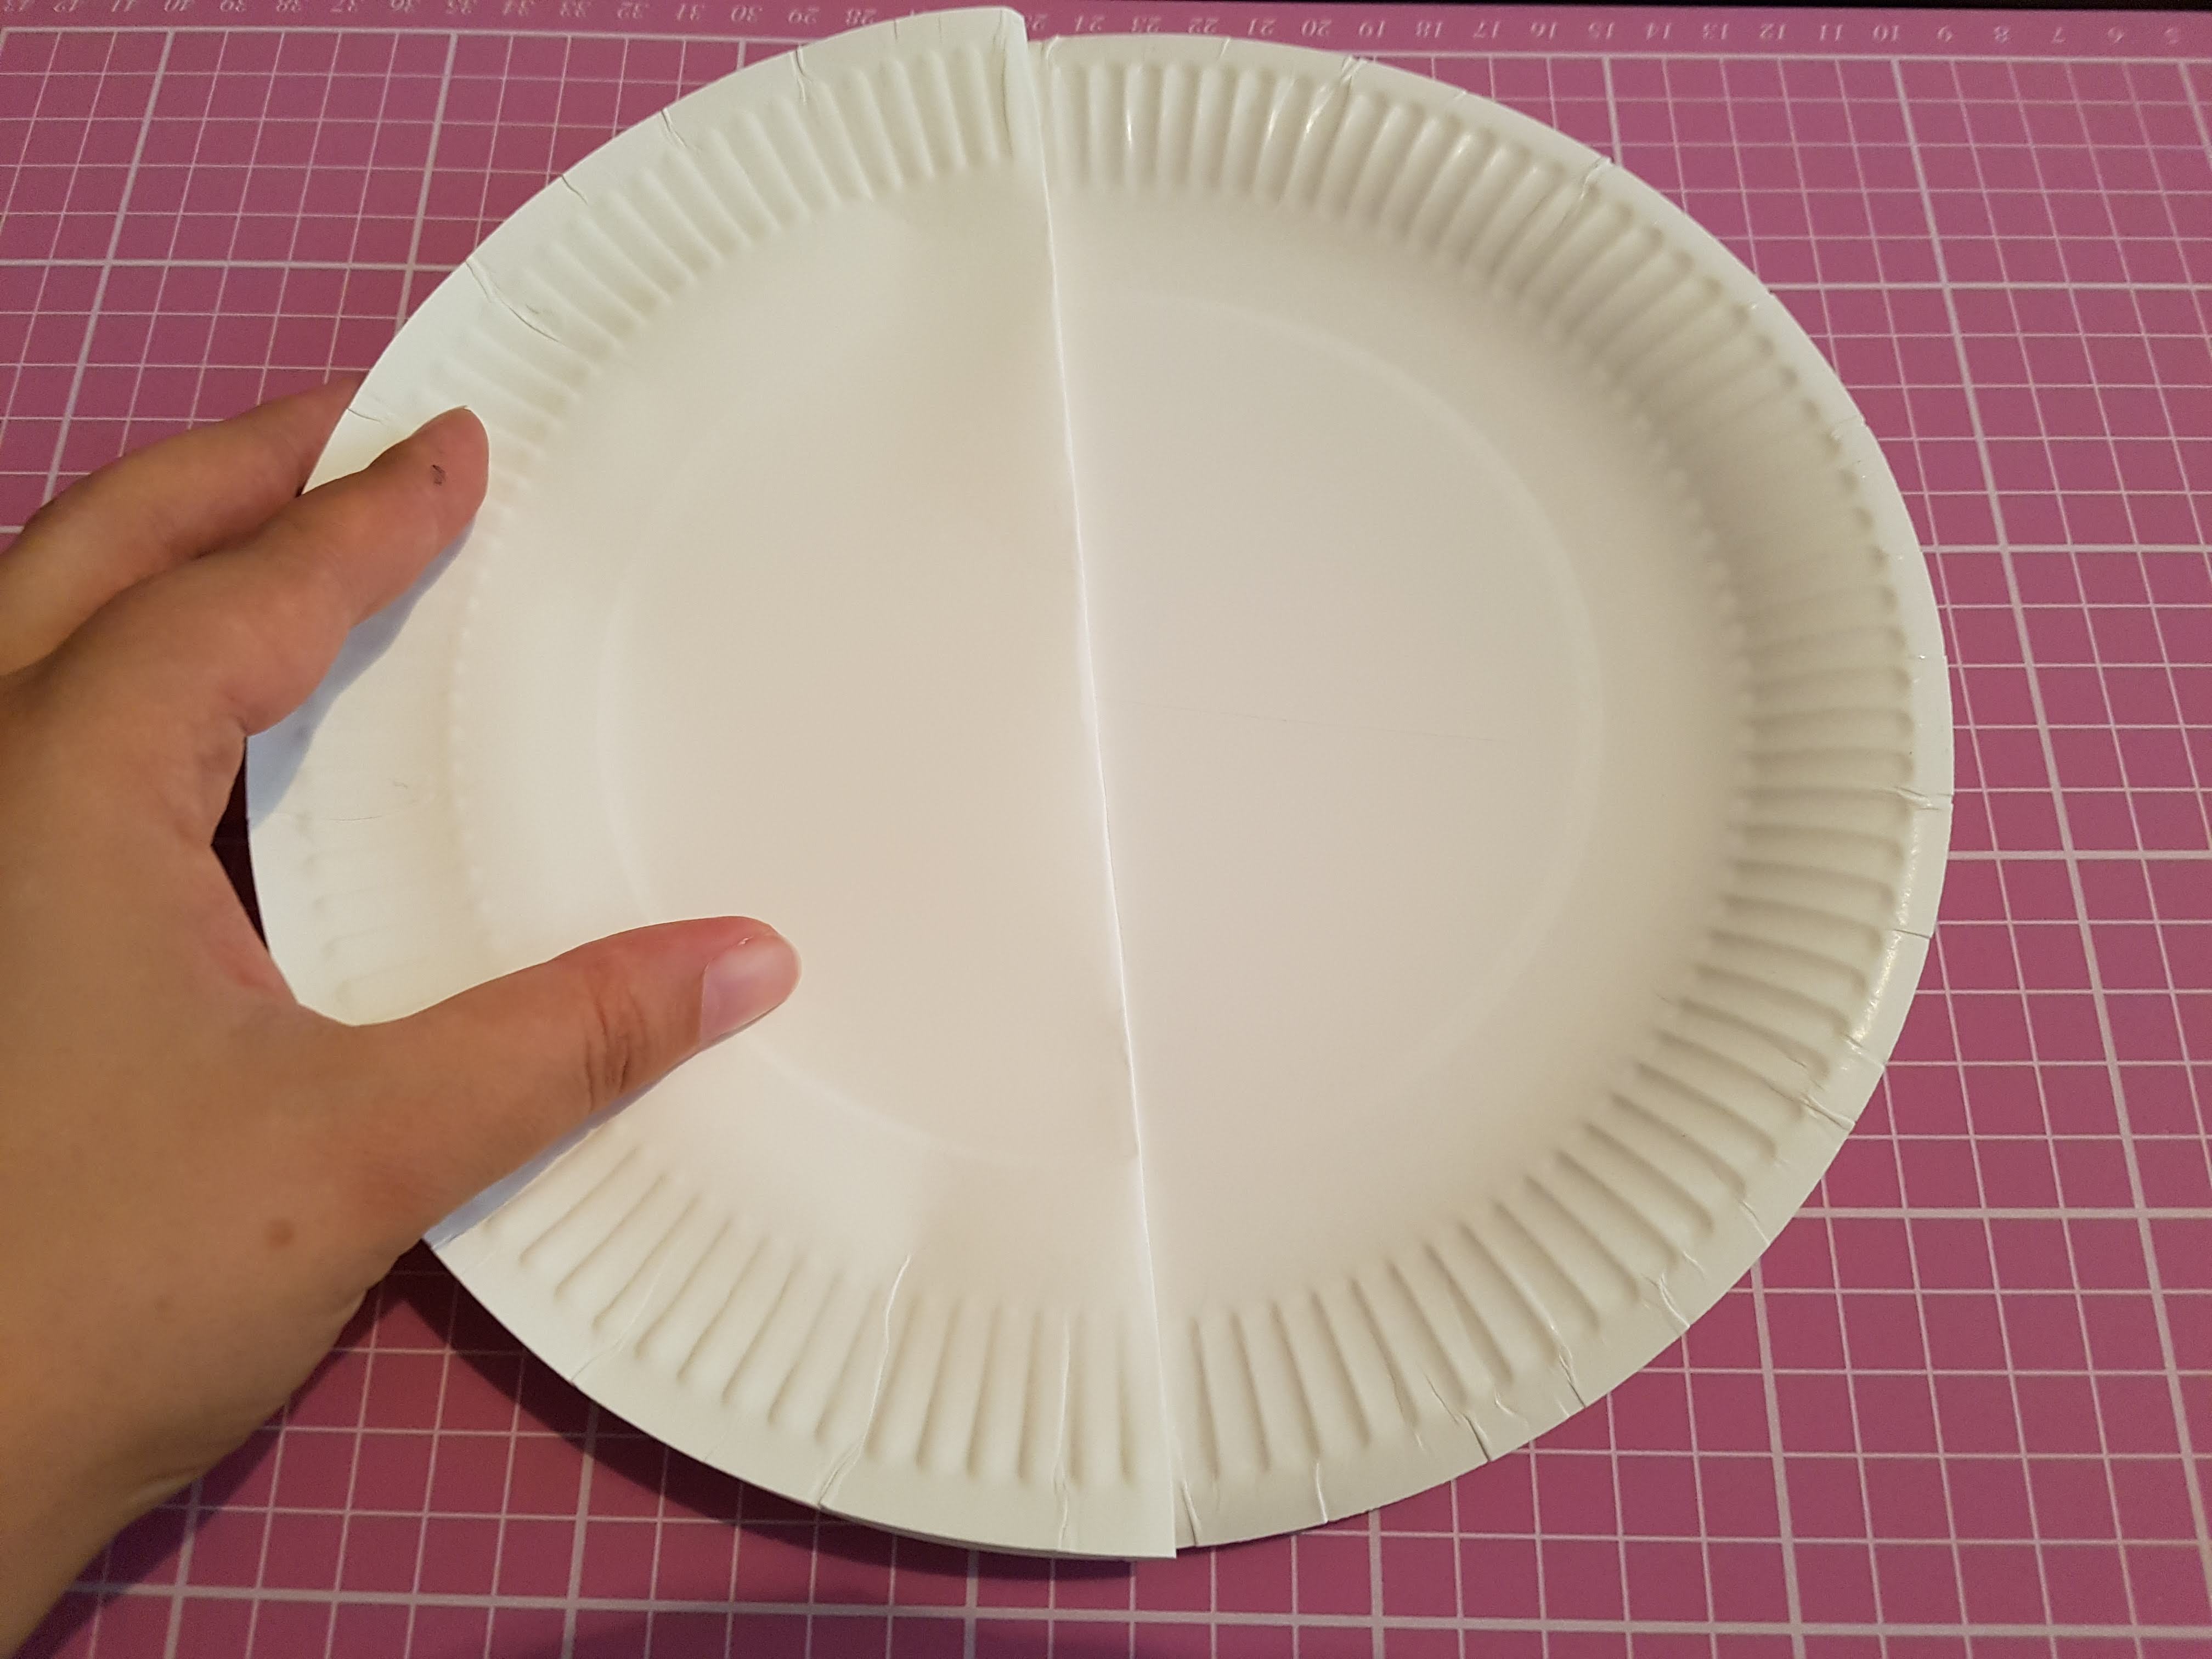
Meanwhile, as they are cutting out their angles, take another paper plate and draw lines from the ends of the chord to the centre. One way to mark the centre is to fold a plate to give a semi-circle, and use this to draw two diameters that cross in the centre.
Now for the big reveal! You could invite the volunteers to compare their angles so they can arrange themselves in order from smallest to biggest angle, or simply wow them with the prediction that all of their angles will be identical, no matter which point they chose! For an extra punch to the punchline, cut out the angle at the centre of your plate, and show that any two of the angles at the circumference go together to make an angle the same size as your centre angle!
Proof:
For some, the wow moment of the angles being the same is enough, but some people will be desperate to know WHY this trick works. Here’s a diagram that you can prepare in advance on a paper plate to show them.
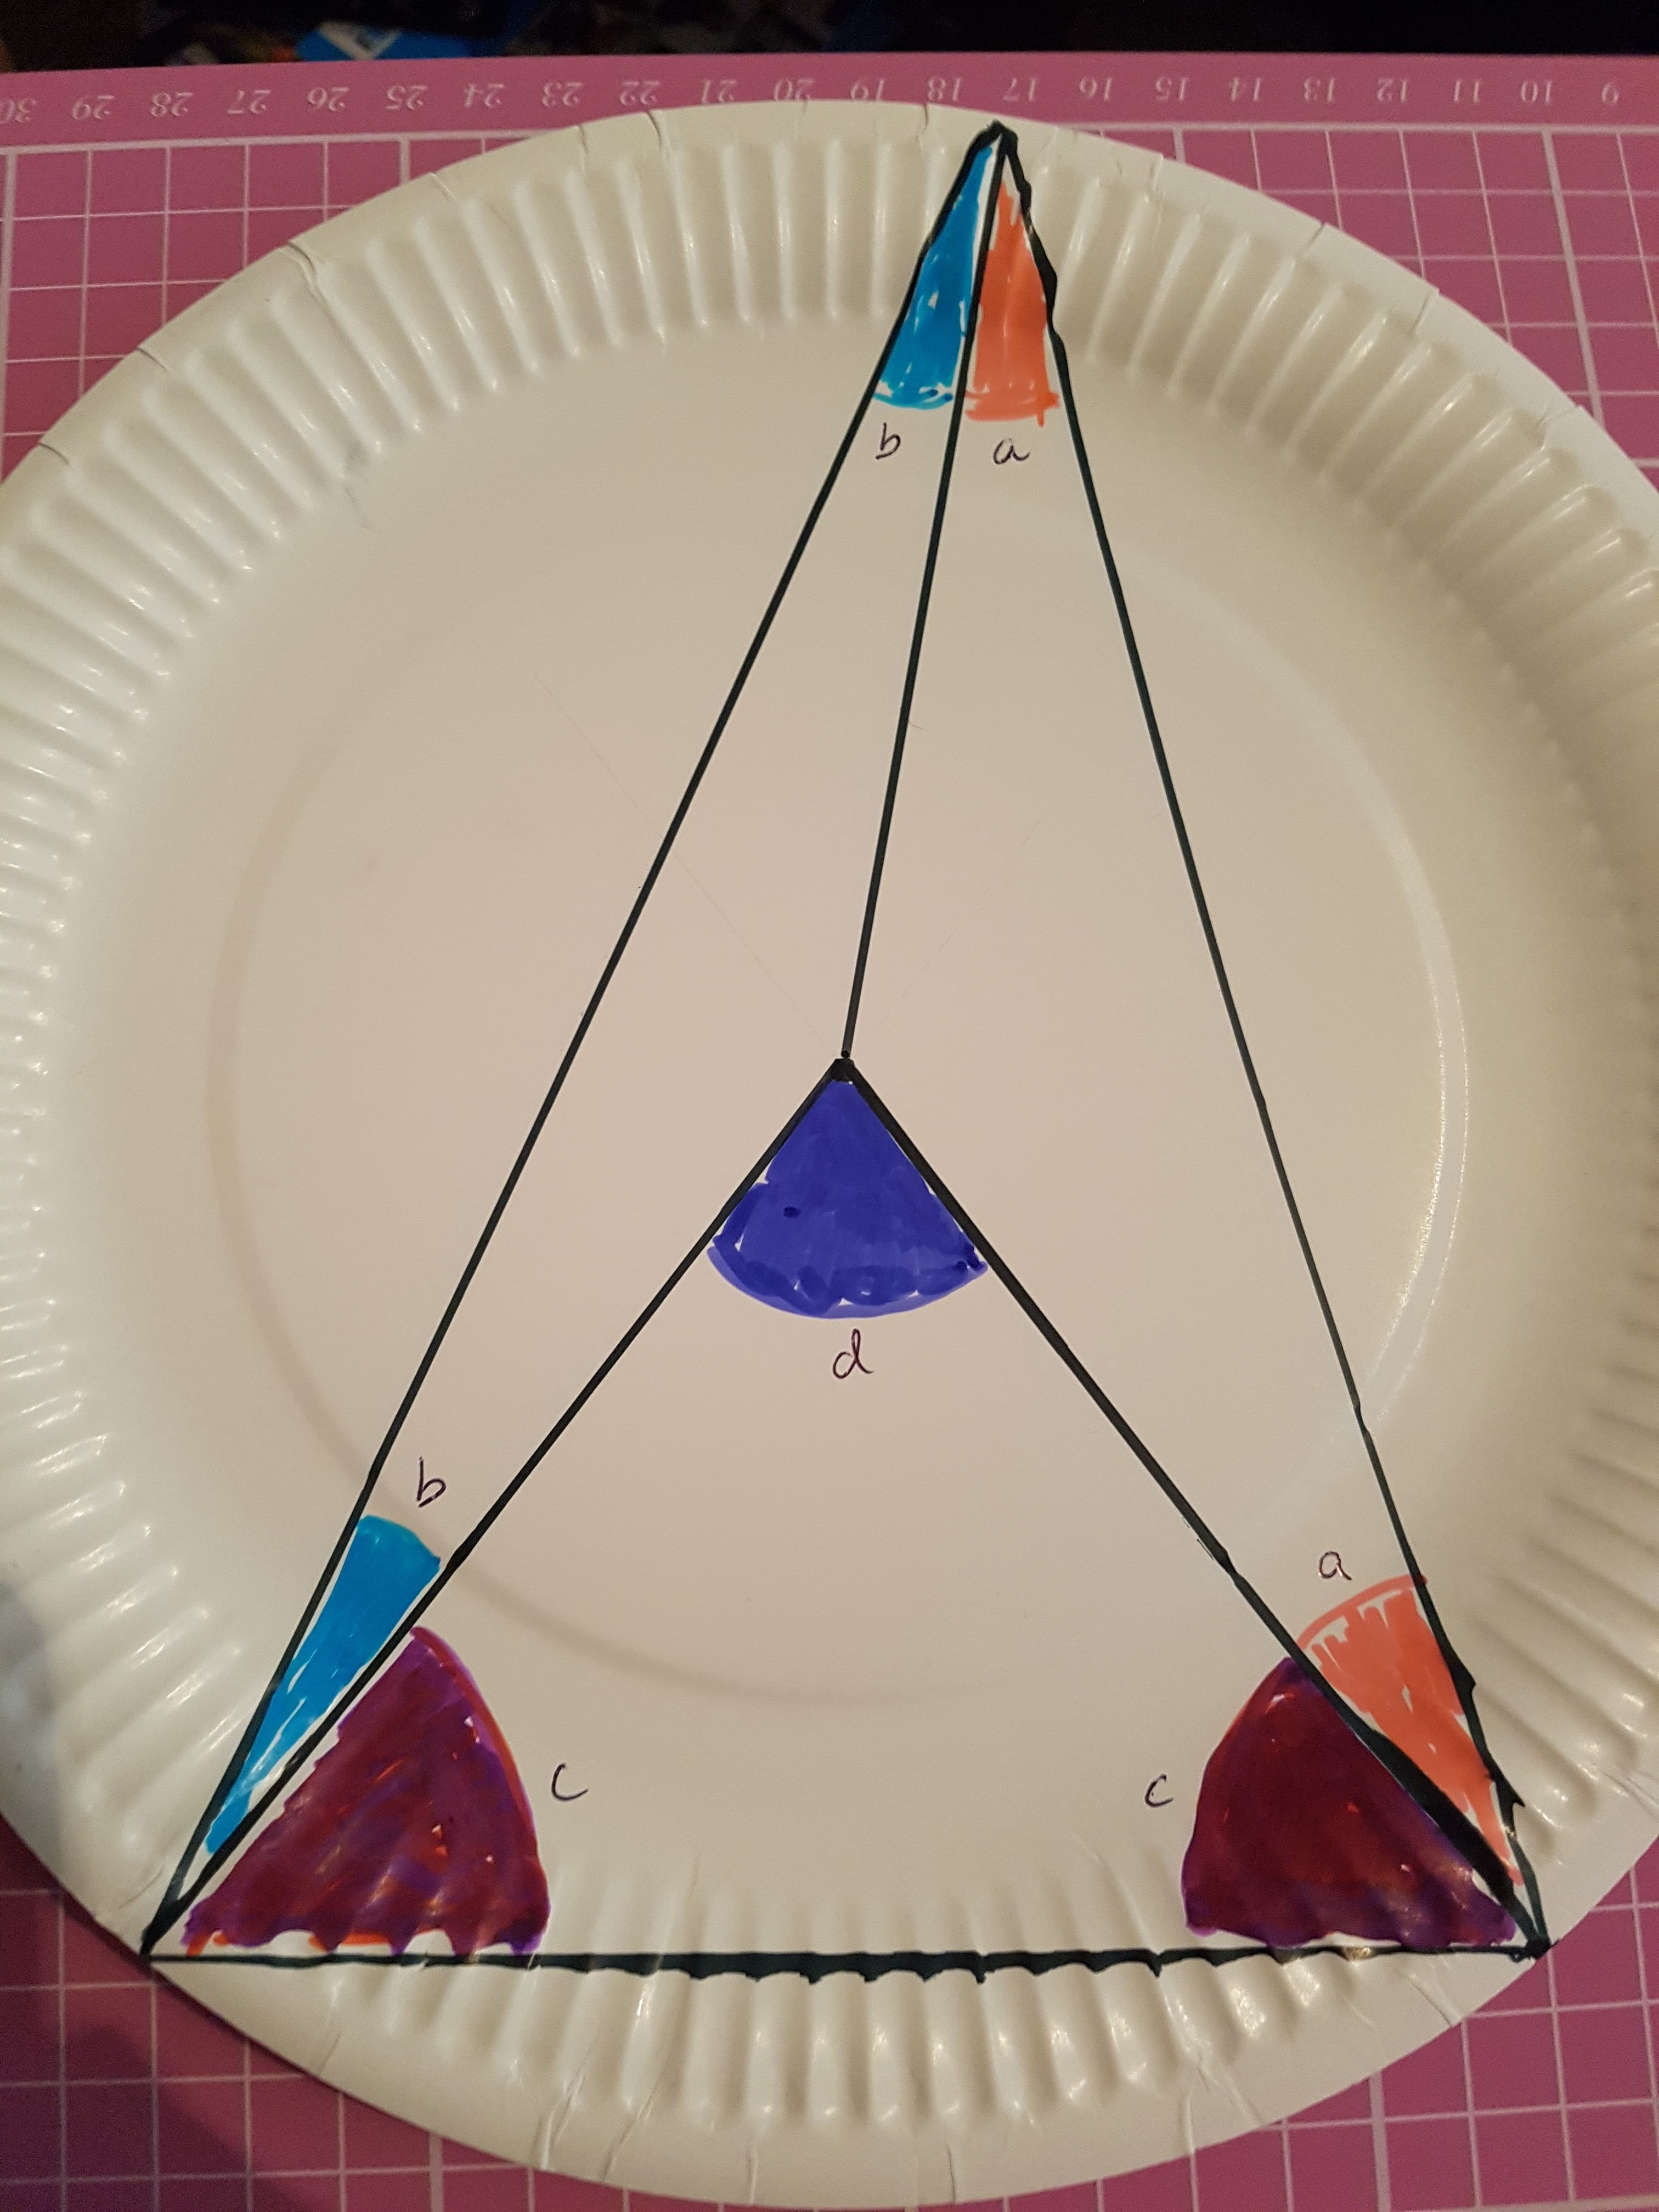
A point is chosen on the circumference, and lines are drawn from the chord to that point, and to the centre of the circle. This forms three isosceles triangles; they are isosceles because two sides are radii. This tells us that the pink angles (marked a) are equal, the pale blue angles (marked b) are equal, and the purple angles (marked c) are equal.
Dark blue and two purples form a triangle; two pinks, two light blues and two purples also form a triangle. That means the dark blue angle is equivalent to two pinks and two light blues! (Using algebra, 2a+2b+2c = 2c + d, so d=2a+2b.)
This is fine when there is no overlapping, but what if the centre of the circle is outside the triangle formed by the chord and the point on the circumference?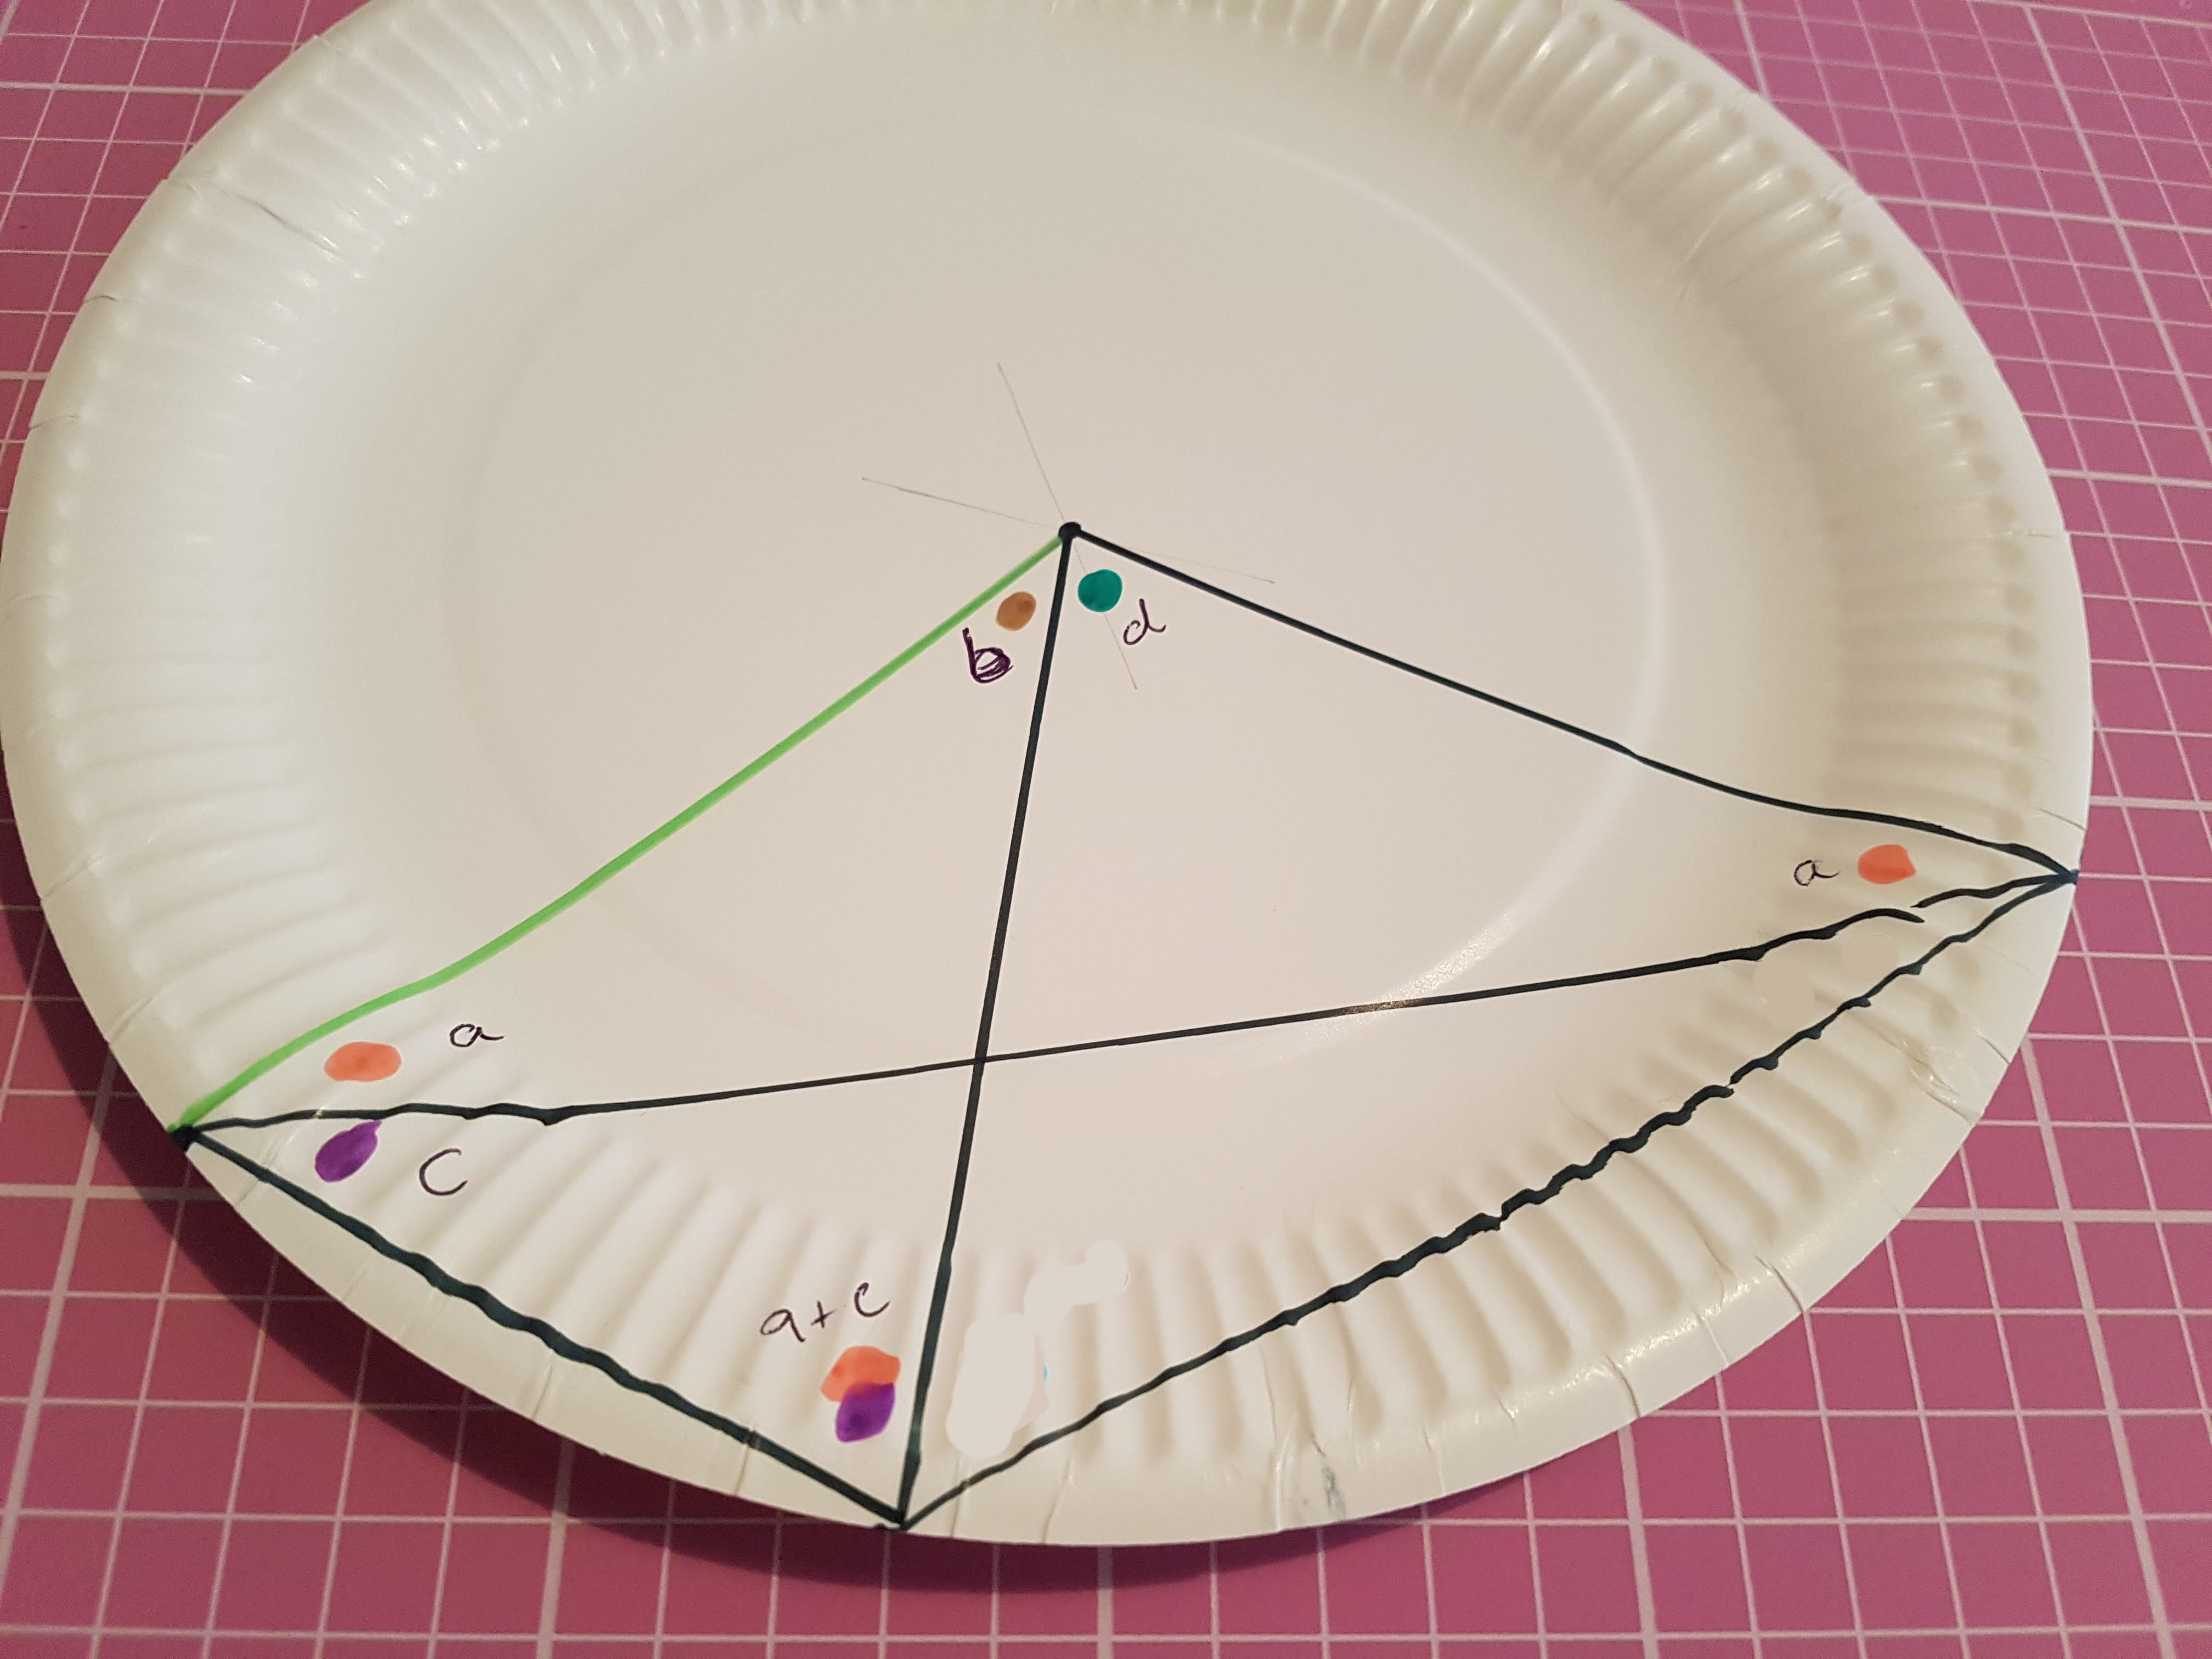
This time, I’ve marked two pink angles a, in an isosceles triangle as before. In the other isosceles triangle, I’ve marked a purple angle c and then I know the other angle is a+c, which I represented by putting two blobs of colour together.
Two pinks, a brown and a green is the same as two pinks, two purples and a brown, so the green is equivalent to two purples. (Algebraically, 2a + b + d = a + c + a + c + b, so d = 2c.)
I have written the proof algebraically as well as using colours; you can use colours, symbols, emoji stickers, whatever you like really! Avoiding algebra might be useful if dealing with an audience who might be mathsphobic or not yet fluent with algebra.
Further ideas:
You could also use paper plates to show that the angle in a semicircle is always 90°, or that opposite angles in a cyclic quadrilateral add up to 180°.
Angle c is brown. Regardless, this is great.